Rolling Deep: Foam Rolling!
The foam roller, best friend or enemy? For me, my roller and I have gotten pretty close as I have been packing on more miles for my marathon training. Foam rolling provides soft tissue therapy, or what is also called myofascial release and has many benefits, including:
- Prevents injury
- Improves performance through flexibility
- Decreases muscle tension
It’s common for us runners and athletes to suffer from injury due to “muscle knots”, trigger points in muscles. They start as minor microtears due to repetitive movement and over time can cause pain and stiffness in the areas of the muscle. Common places where we see this take place in running are the quads, hamstrings, hips and the IT band.
Stretching is always a “must do” but in many cases, stretching can only lengthen and provide flexibility to the “healthy” muscles so these tight muscles still remain chronically stiff. This is where the true benefits of the foam roller come in. Foam rolling is able to apply direct pressure in those trigger points and release pressure.
Here are some tips to keep in mind as you begin or continue your foam rolling journey:
- Move slowly, just like when doing yoga, make sure you’re breathing. If the sensation is too tense and you’re not able to breathe, this is a great signal to back off.
- Apply 10 strokes or around 20 seconds to each area. Please note you can do 2 sessions per day. Just make sure you don’t overdo it by foam rolling for 10 minutes per area for example.
- Be careful of tender areas. Again, if you can’t breathe this is a good sign to back off a bit.
- Alignment is key. Just like when running or doing yoga, make sure you’re paying attention to not only the area that you’re working but also how your body is positioned and you’re not feeling pain or discomfort in any other areas.
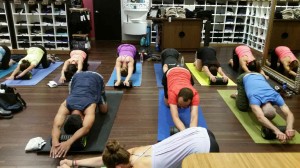
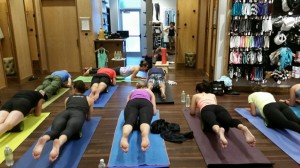
Not sure how to get started or need some new moves? I hosted a yoga foam rolling class at Lululemon’s store in Chestnut Hill this past week (pictures shown above) and here are some of the poses we covered. As you can see below, the foam roller can be used for strength, stretch and massage.
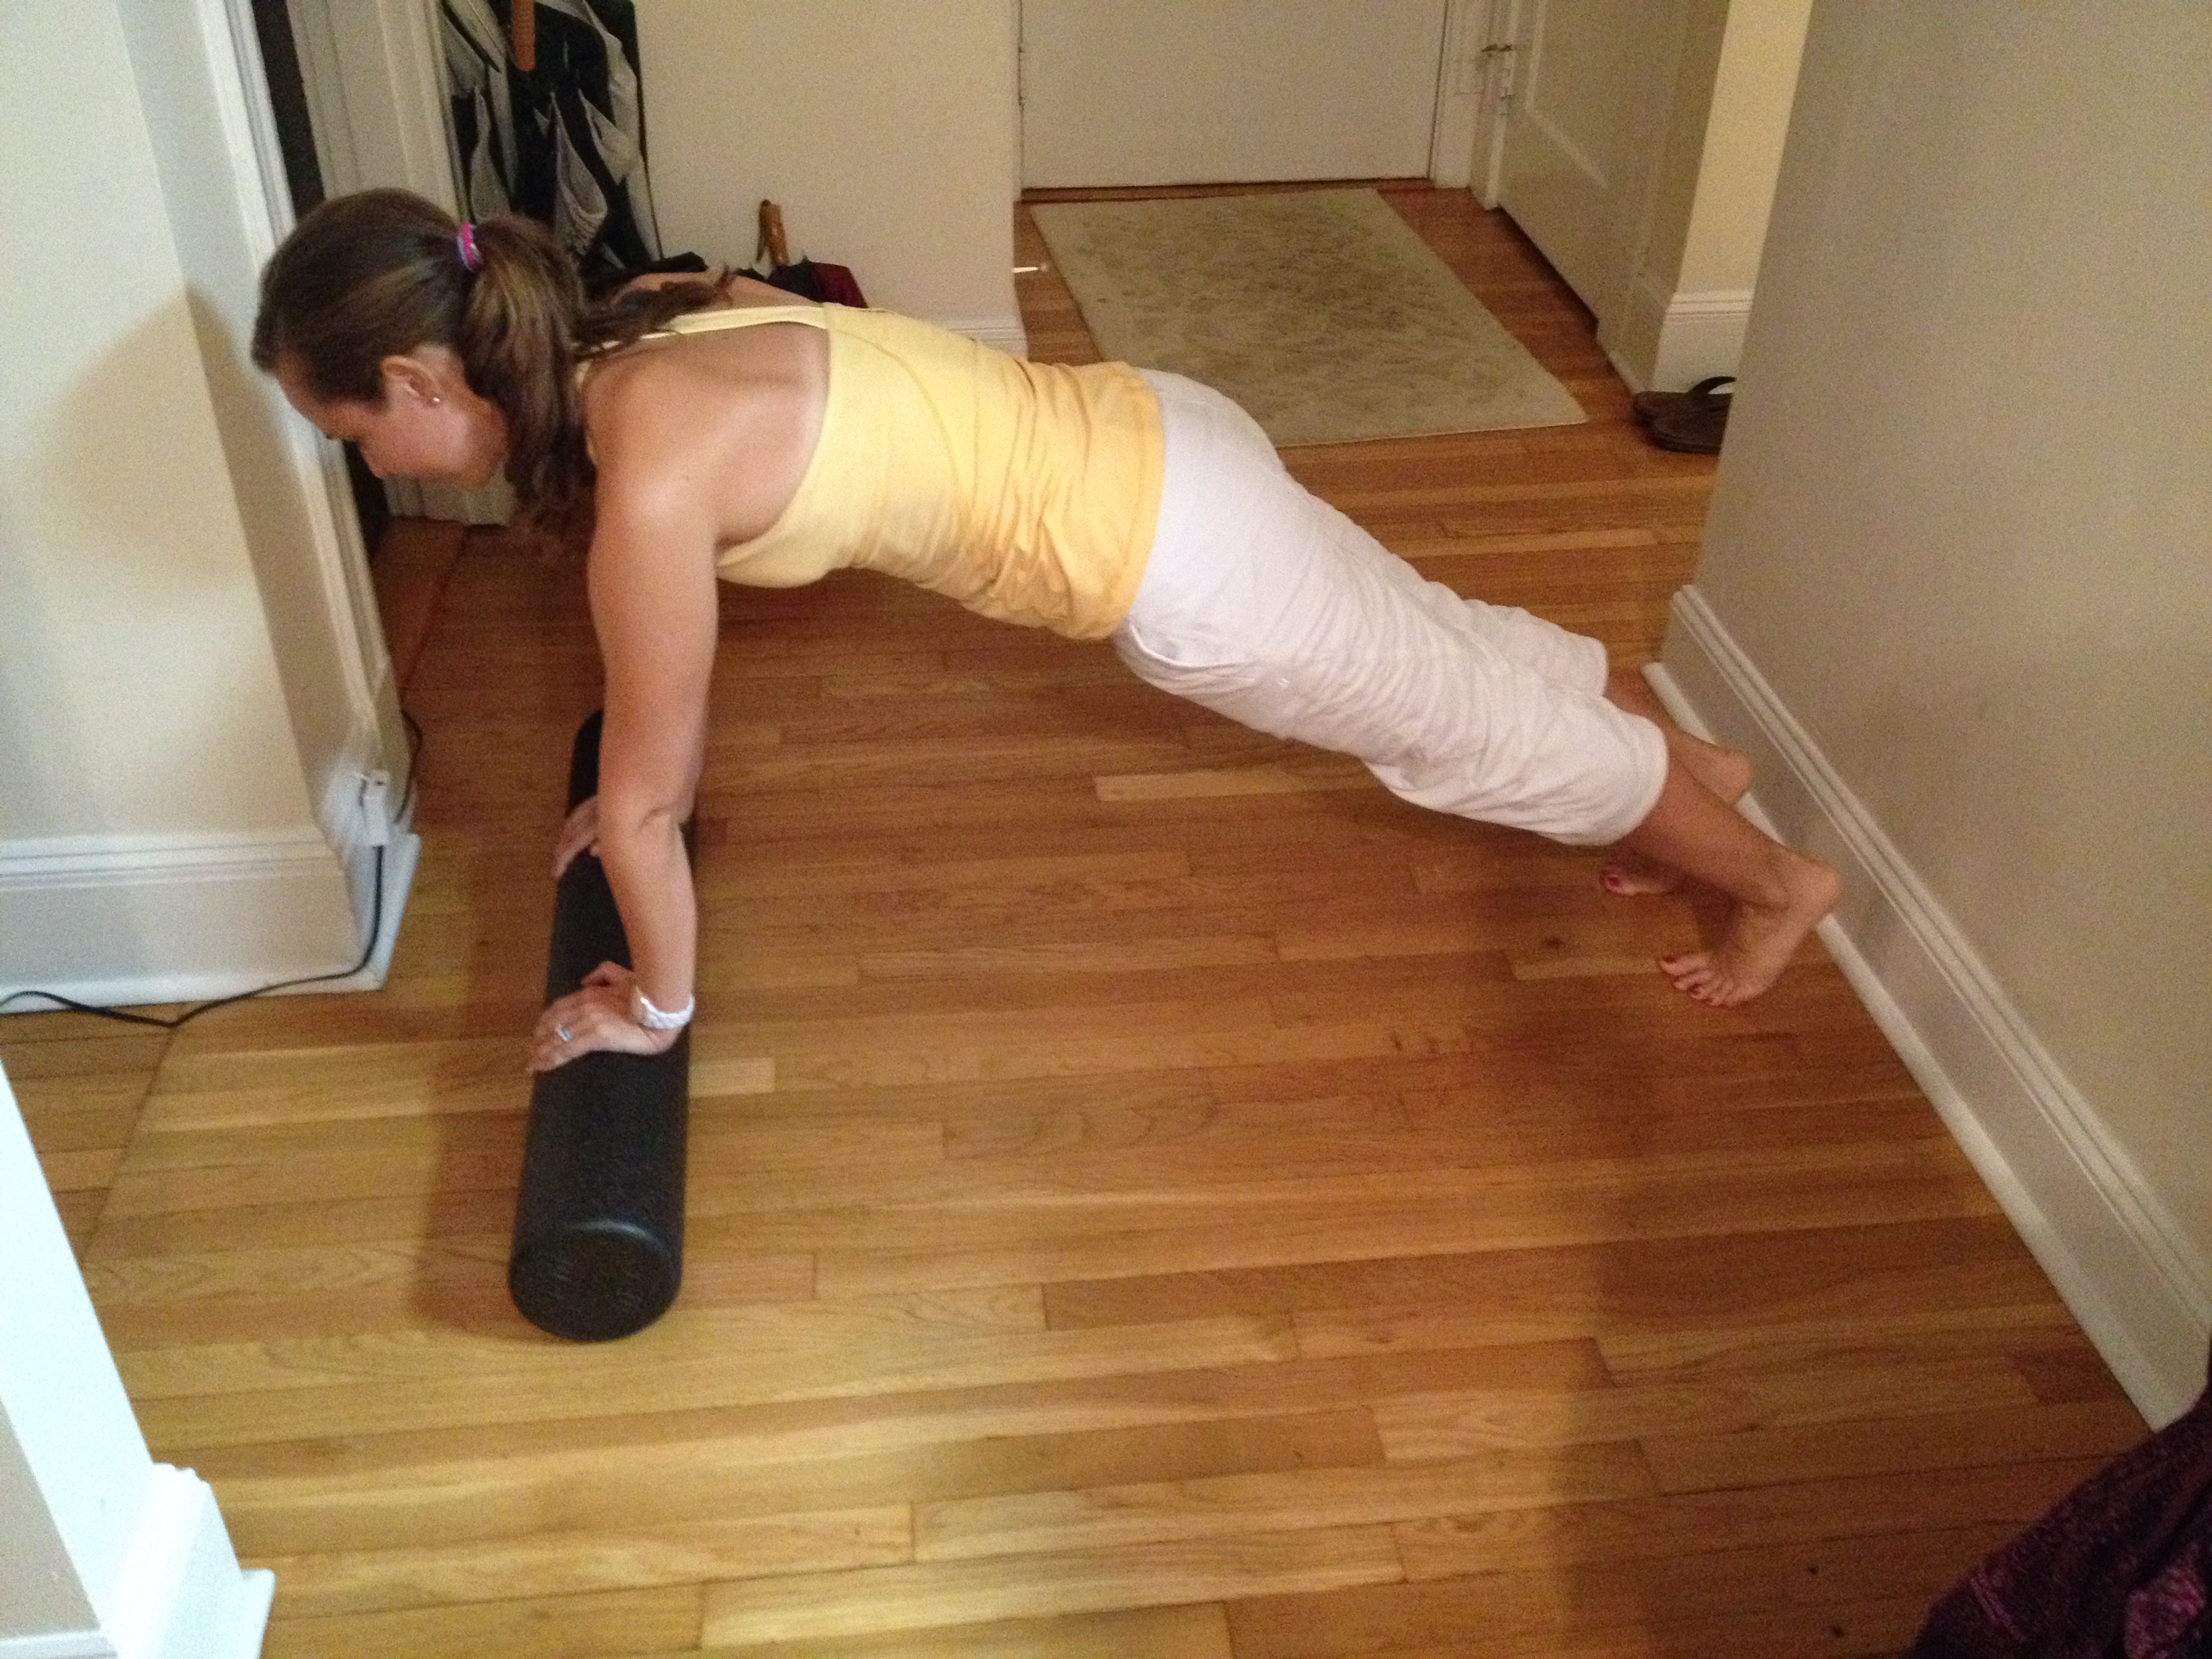
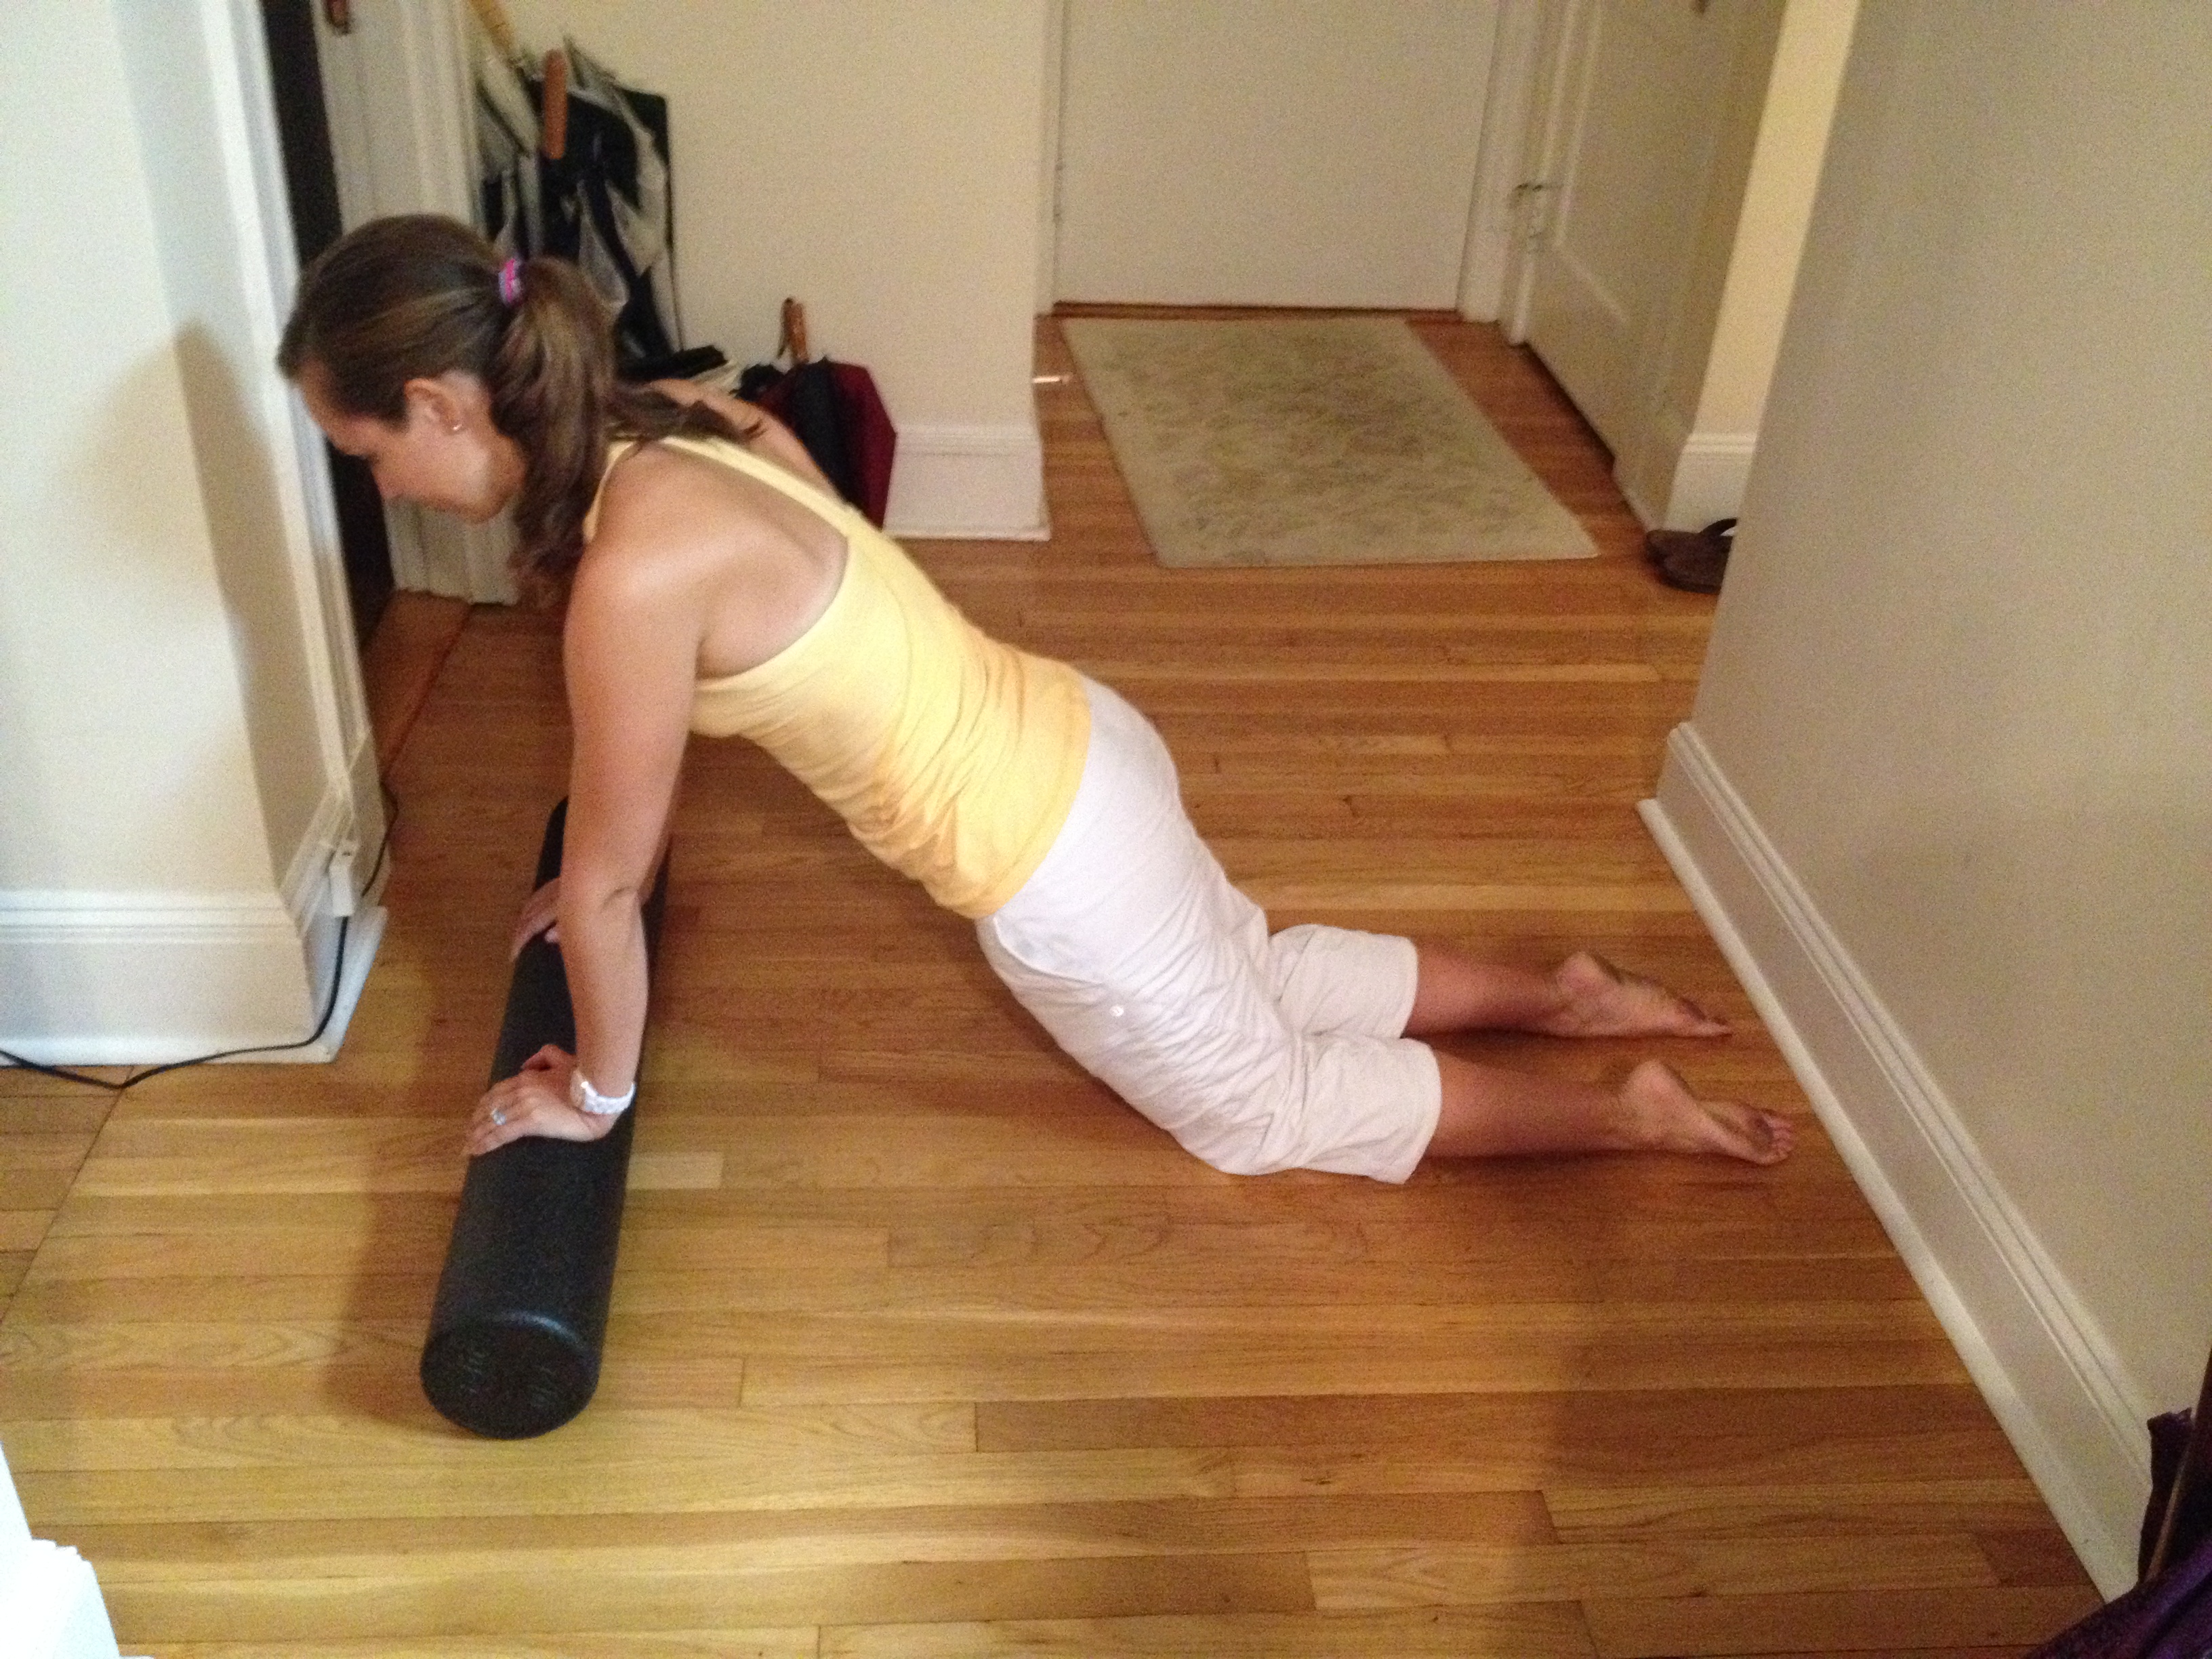
ROLLING FOR STRENGTH
Plank on foam roller
Place your hands on the foam roller and come into plank position. Make sure your wrists are under your shoulders and your hips are in line with your shoulders. If this is too much, you can modify by bringing your knees down to the floor.
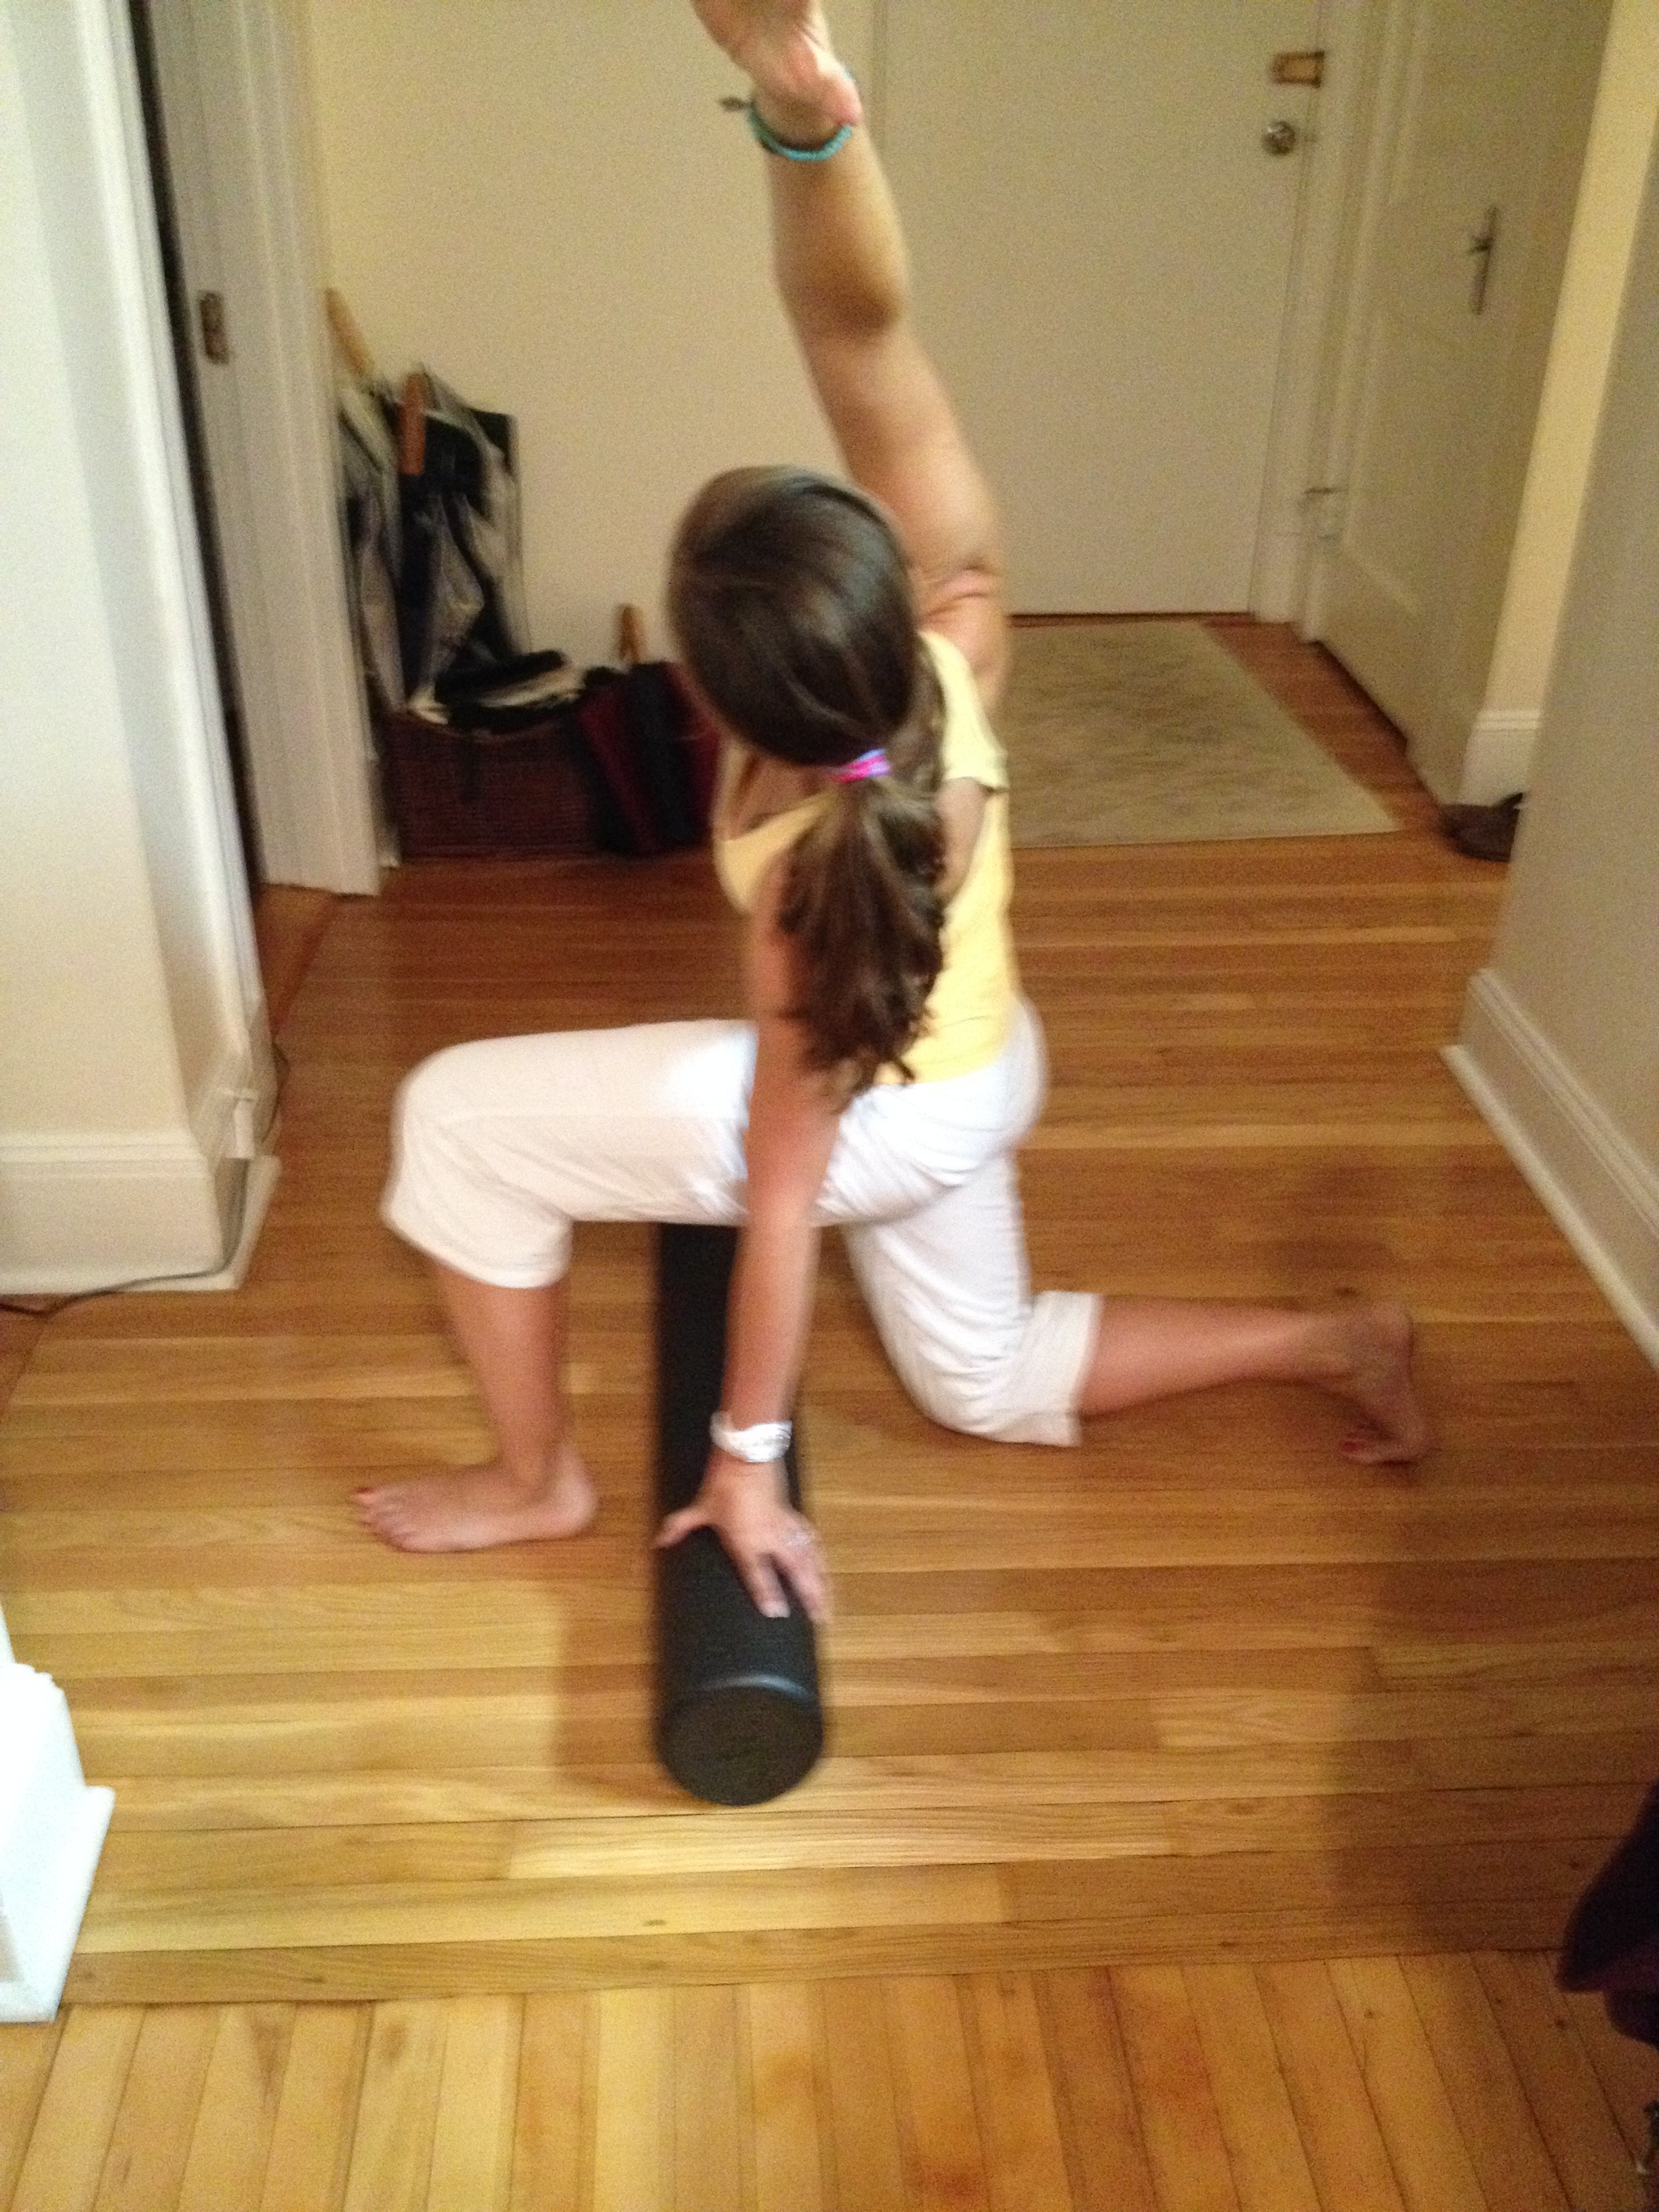
Plank on foam roller with knee to elbow pulses
Similar to mountain climbers, you want to keep your plank alignment (hips down) as you bring your knee into your chest and tap your elbow. Alternate between sides and also feel free to modify by bringing your knee down.
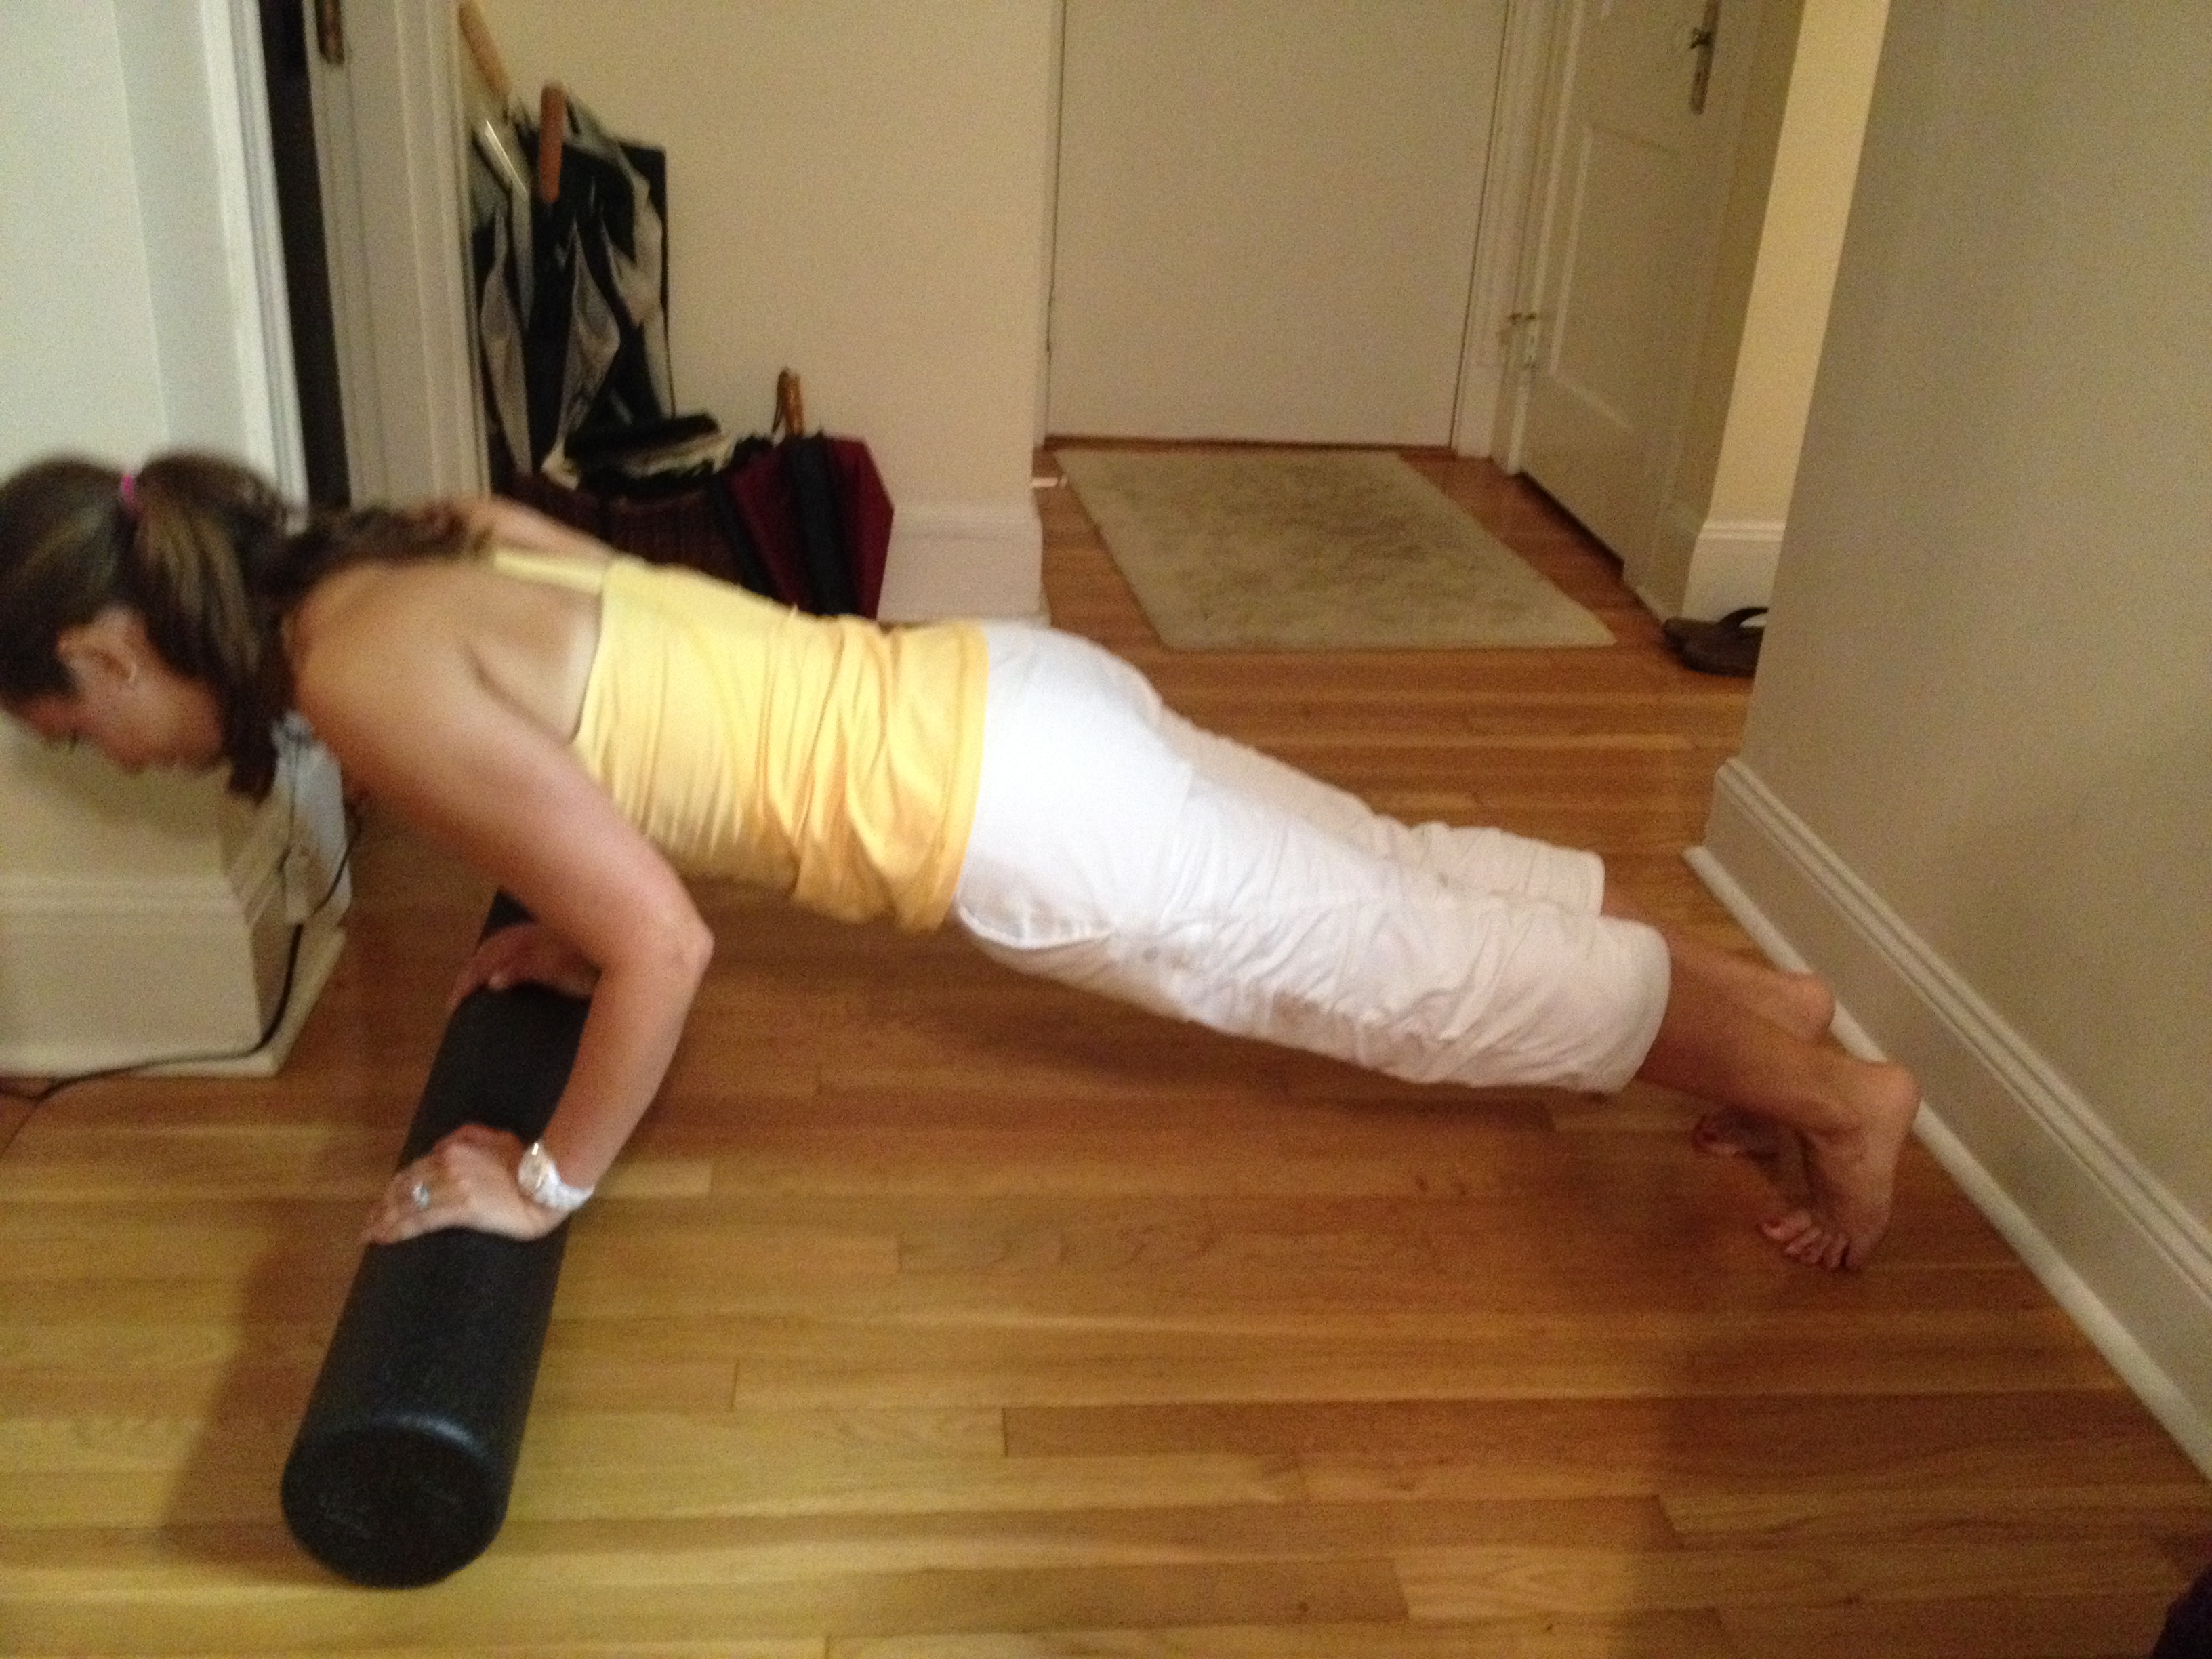
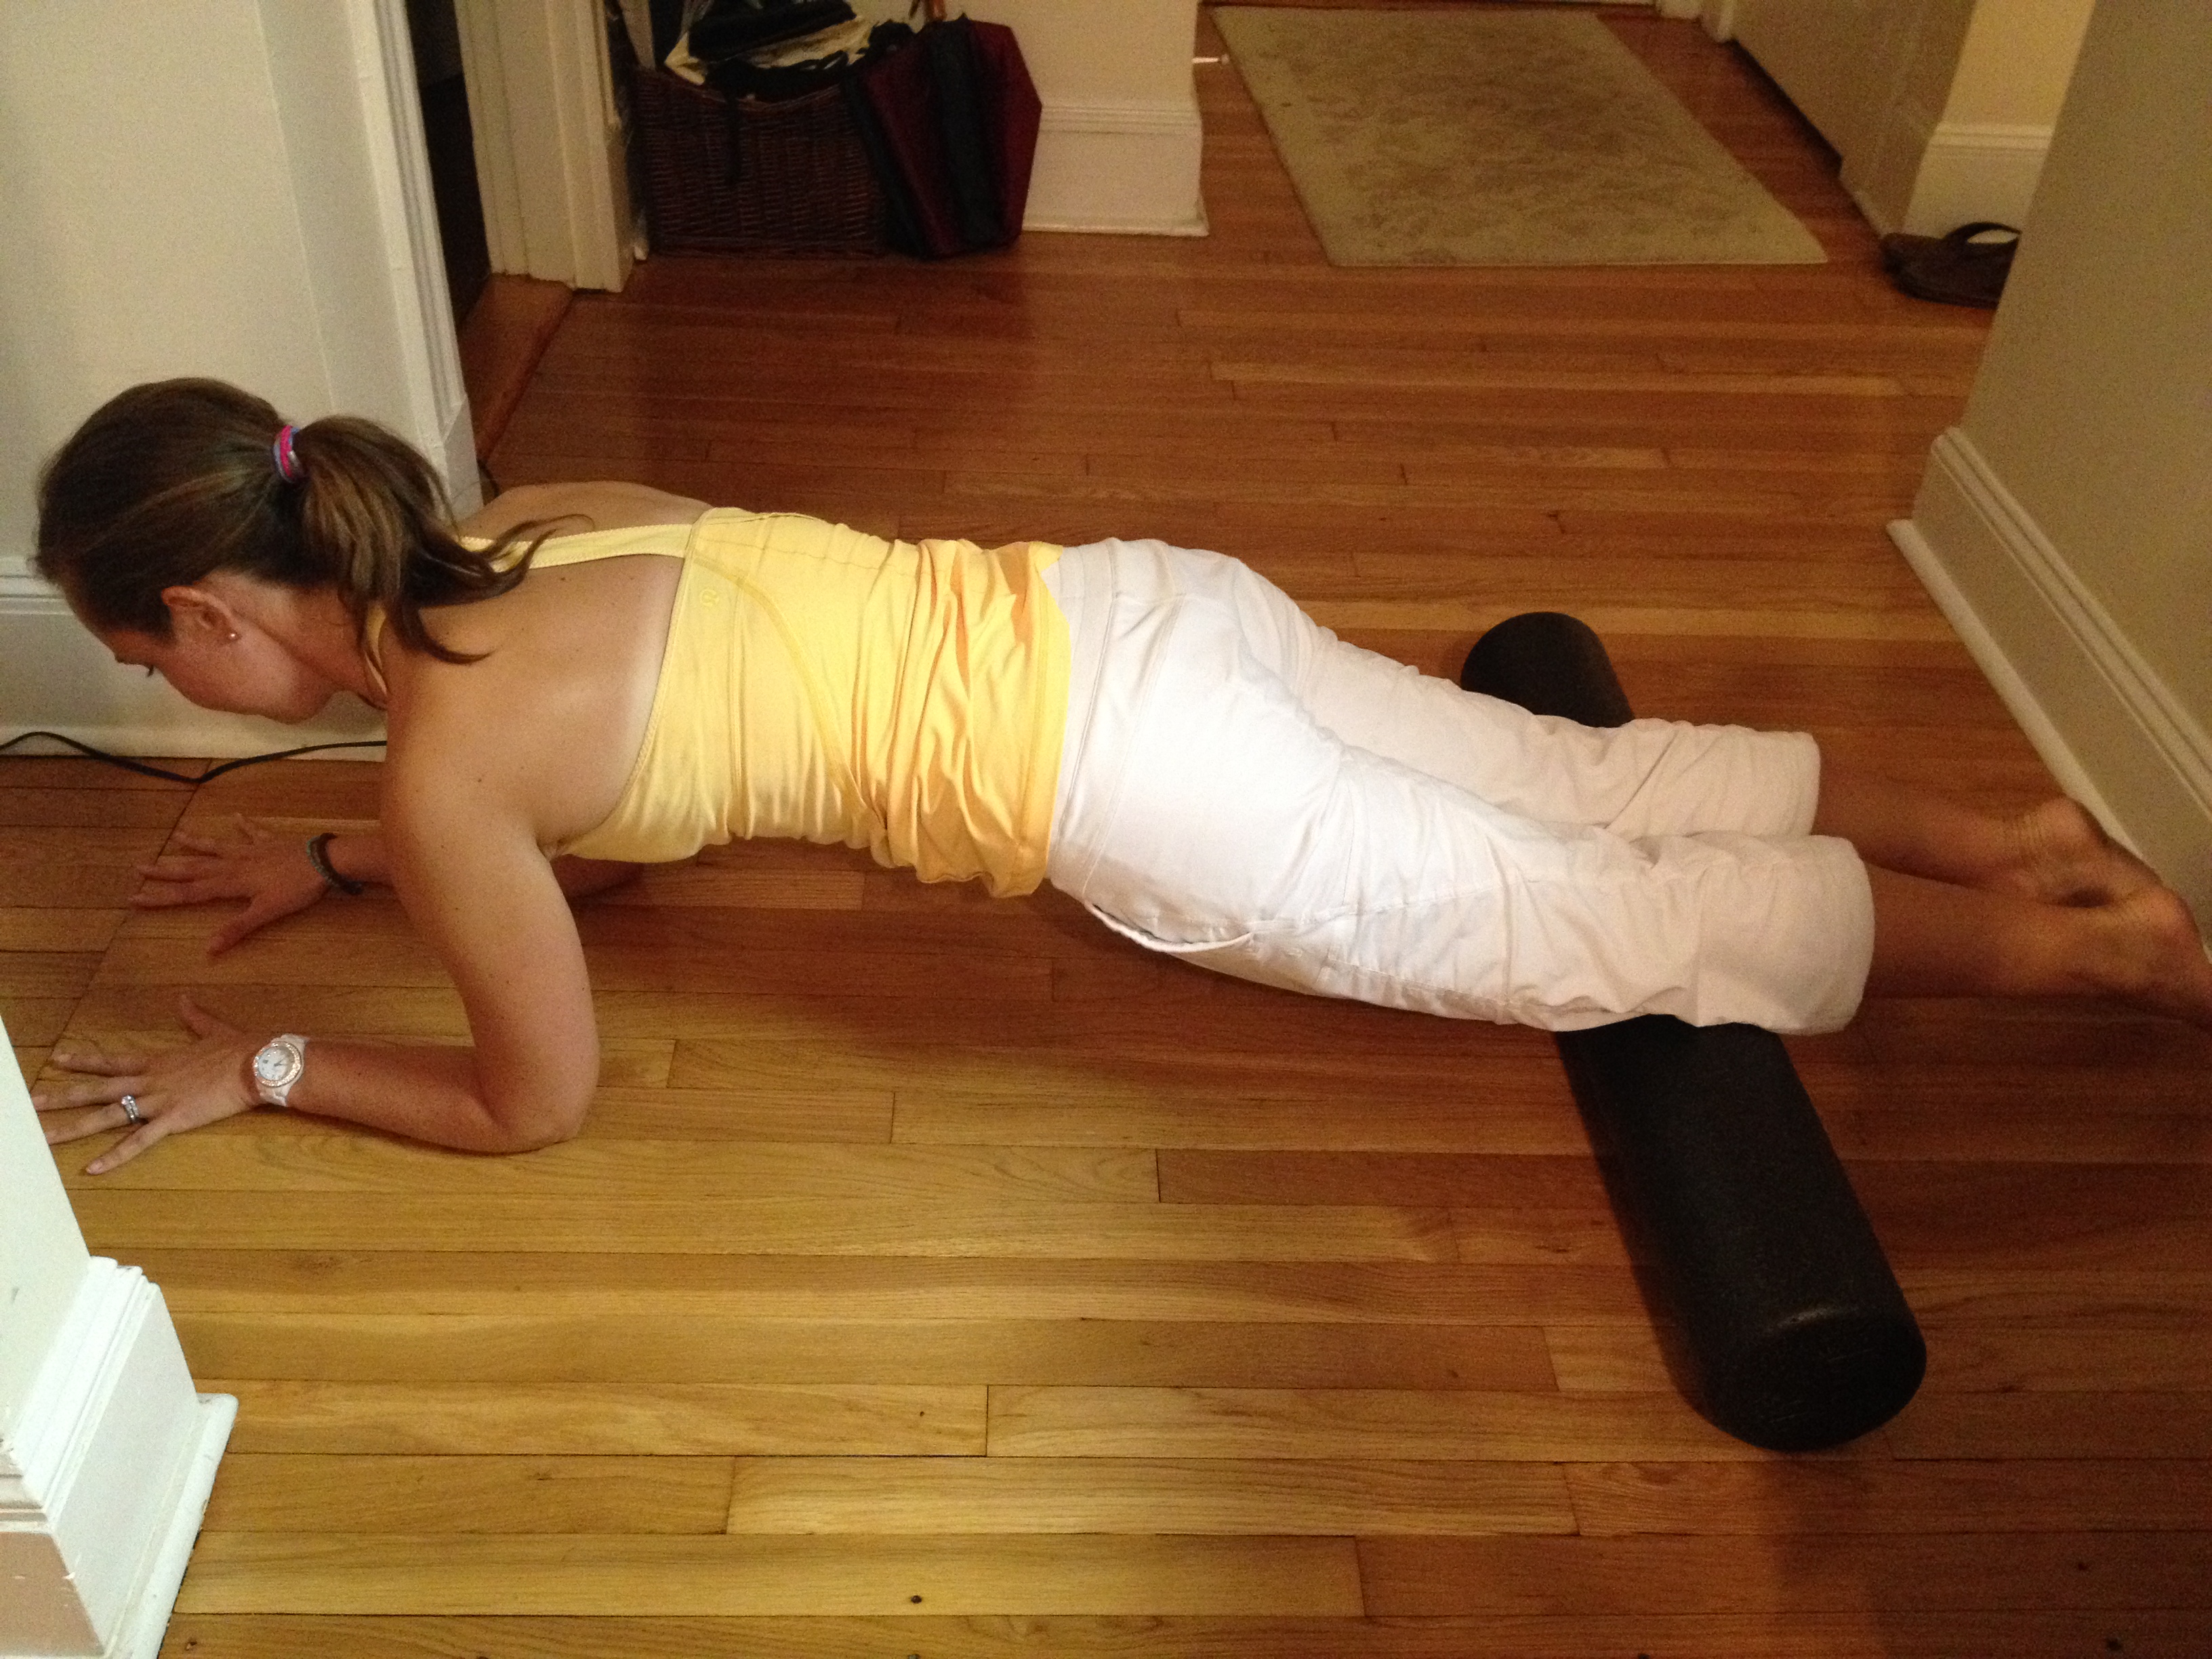
Chaturanga push-ups on foam roller
Keep your plank alignment and bend your elbows towards you and hug them in as you lower down 90 degrees. Then press back up. Try to go for 10 reps. Option to lower the knees down to the floor.
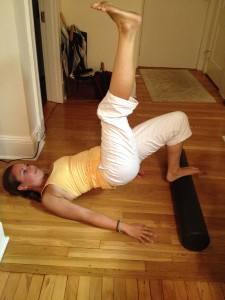
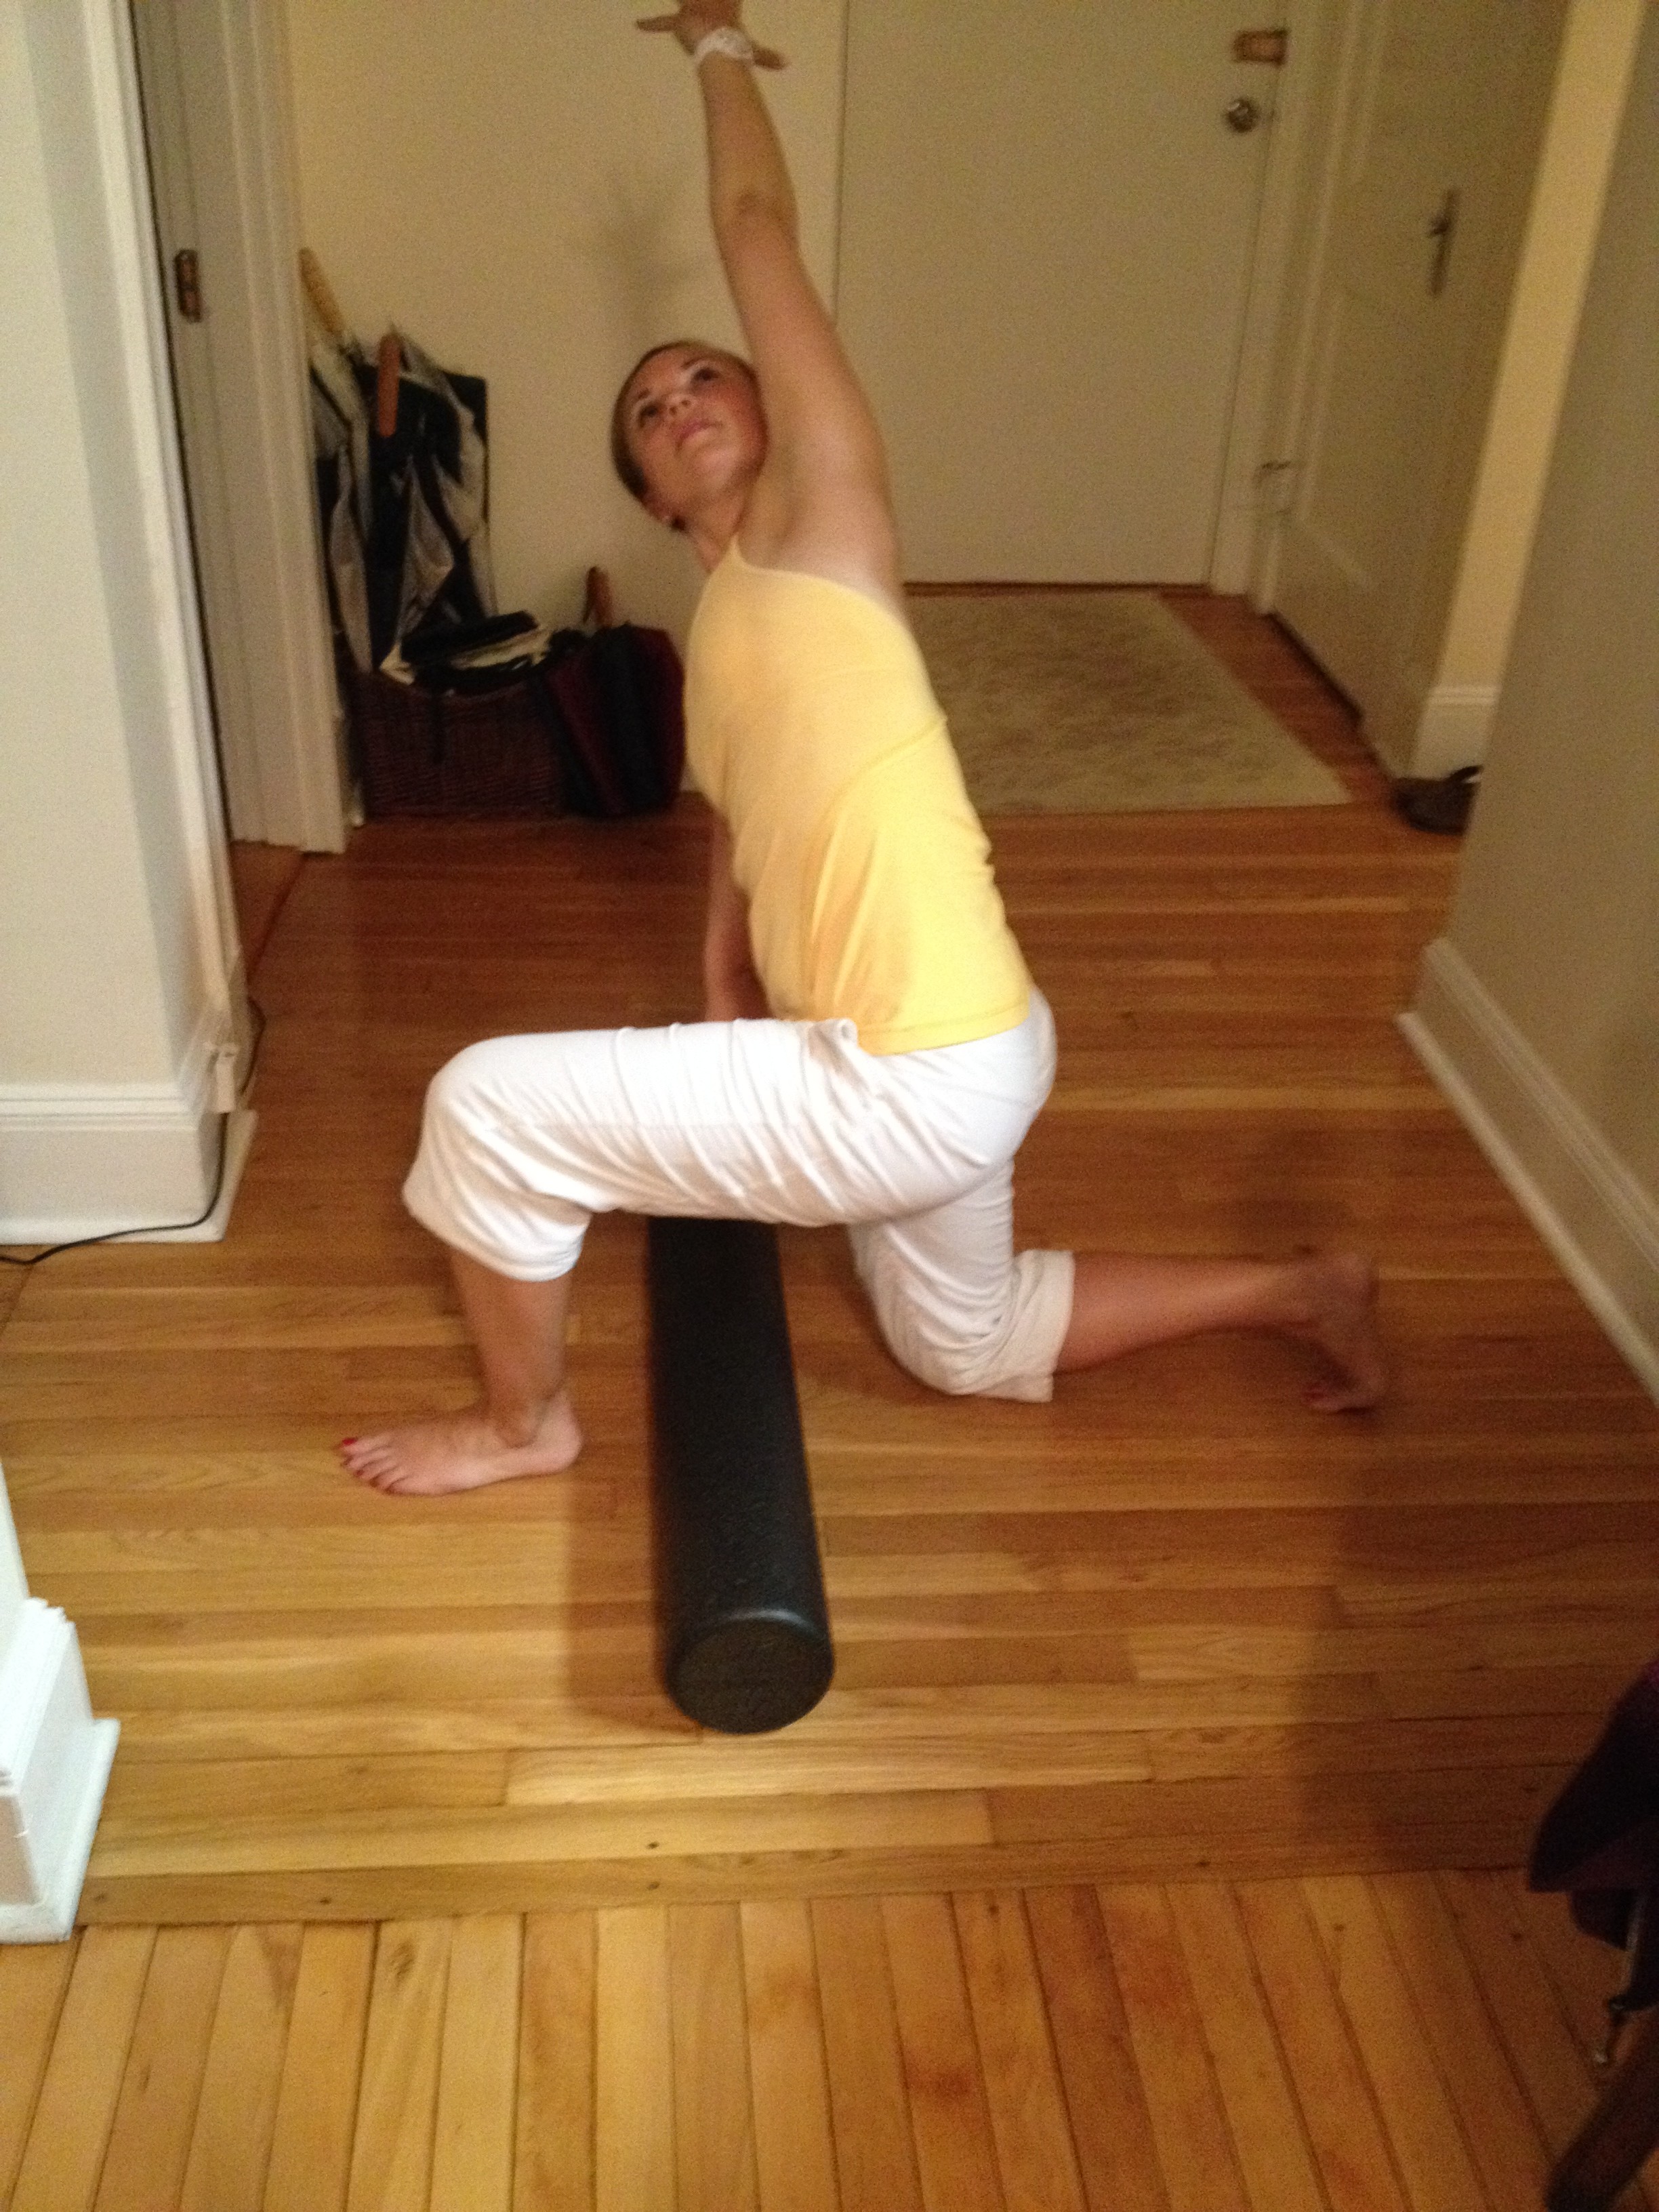
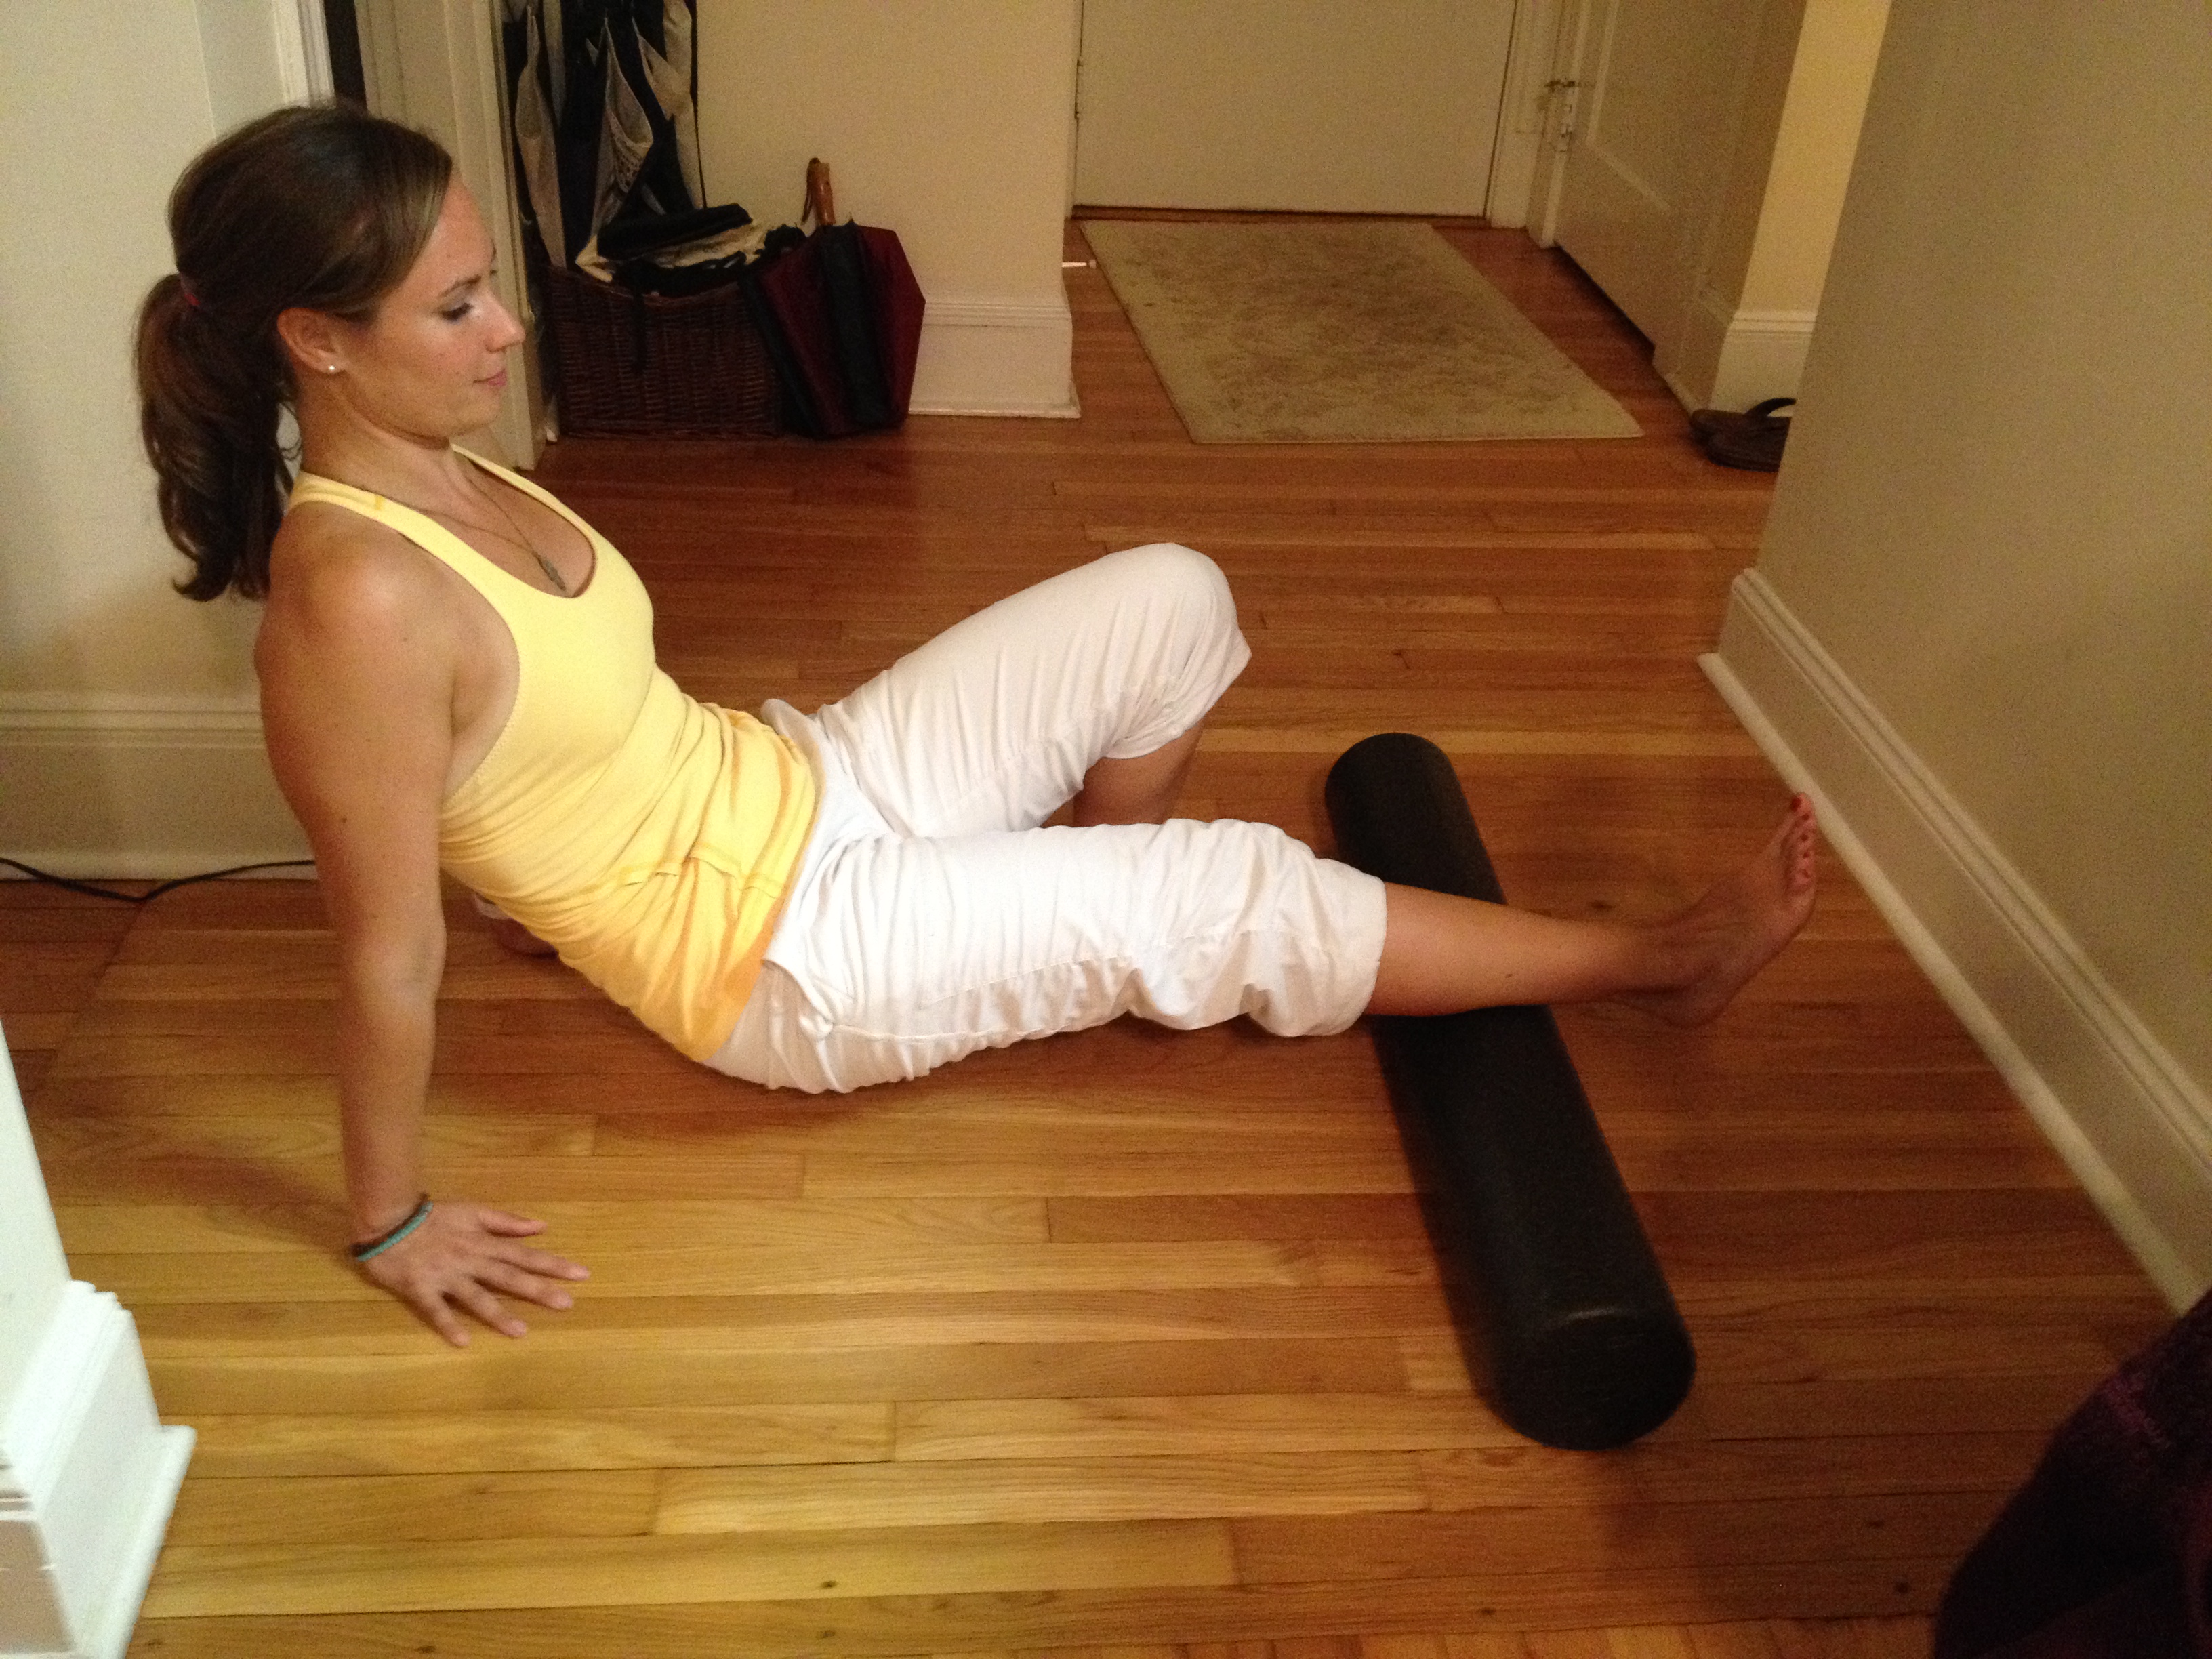
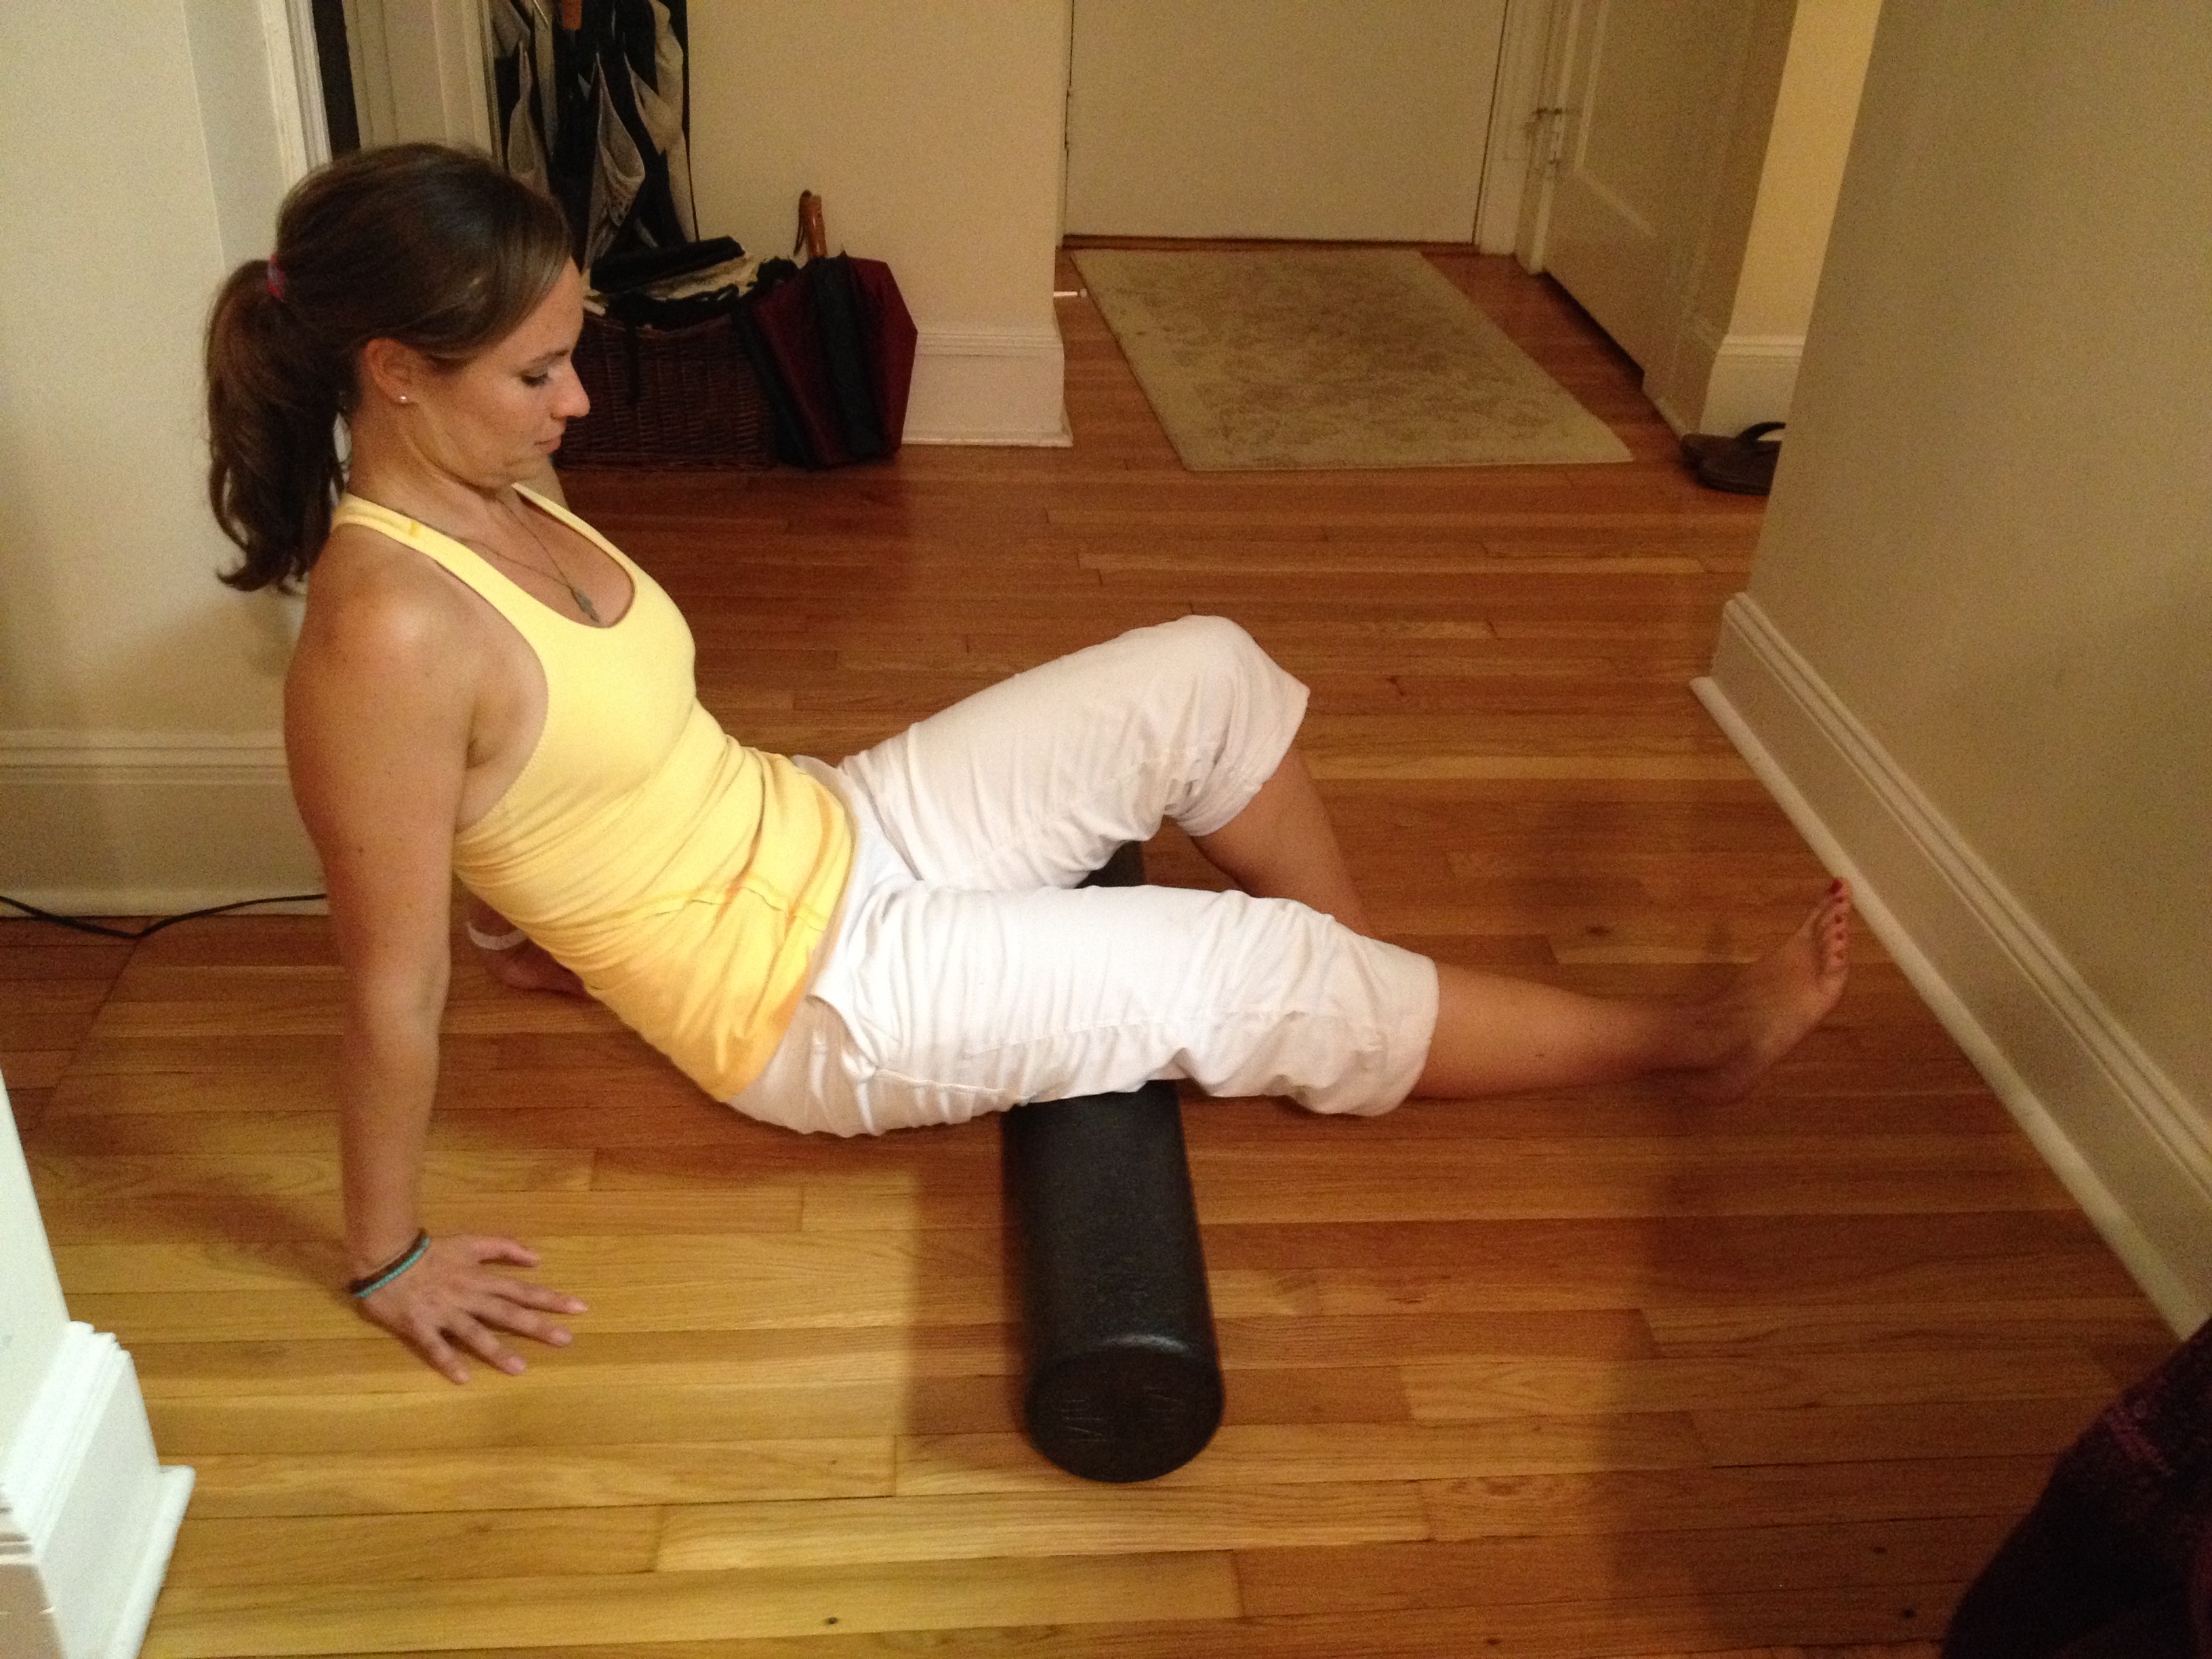
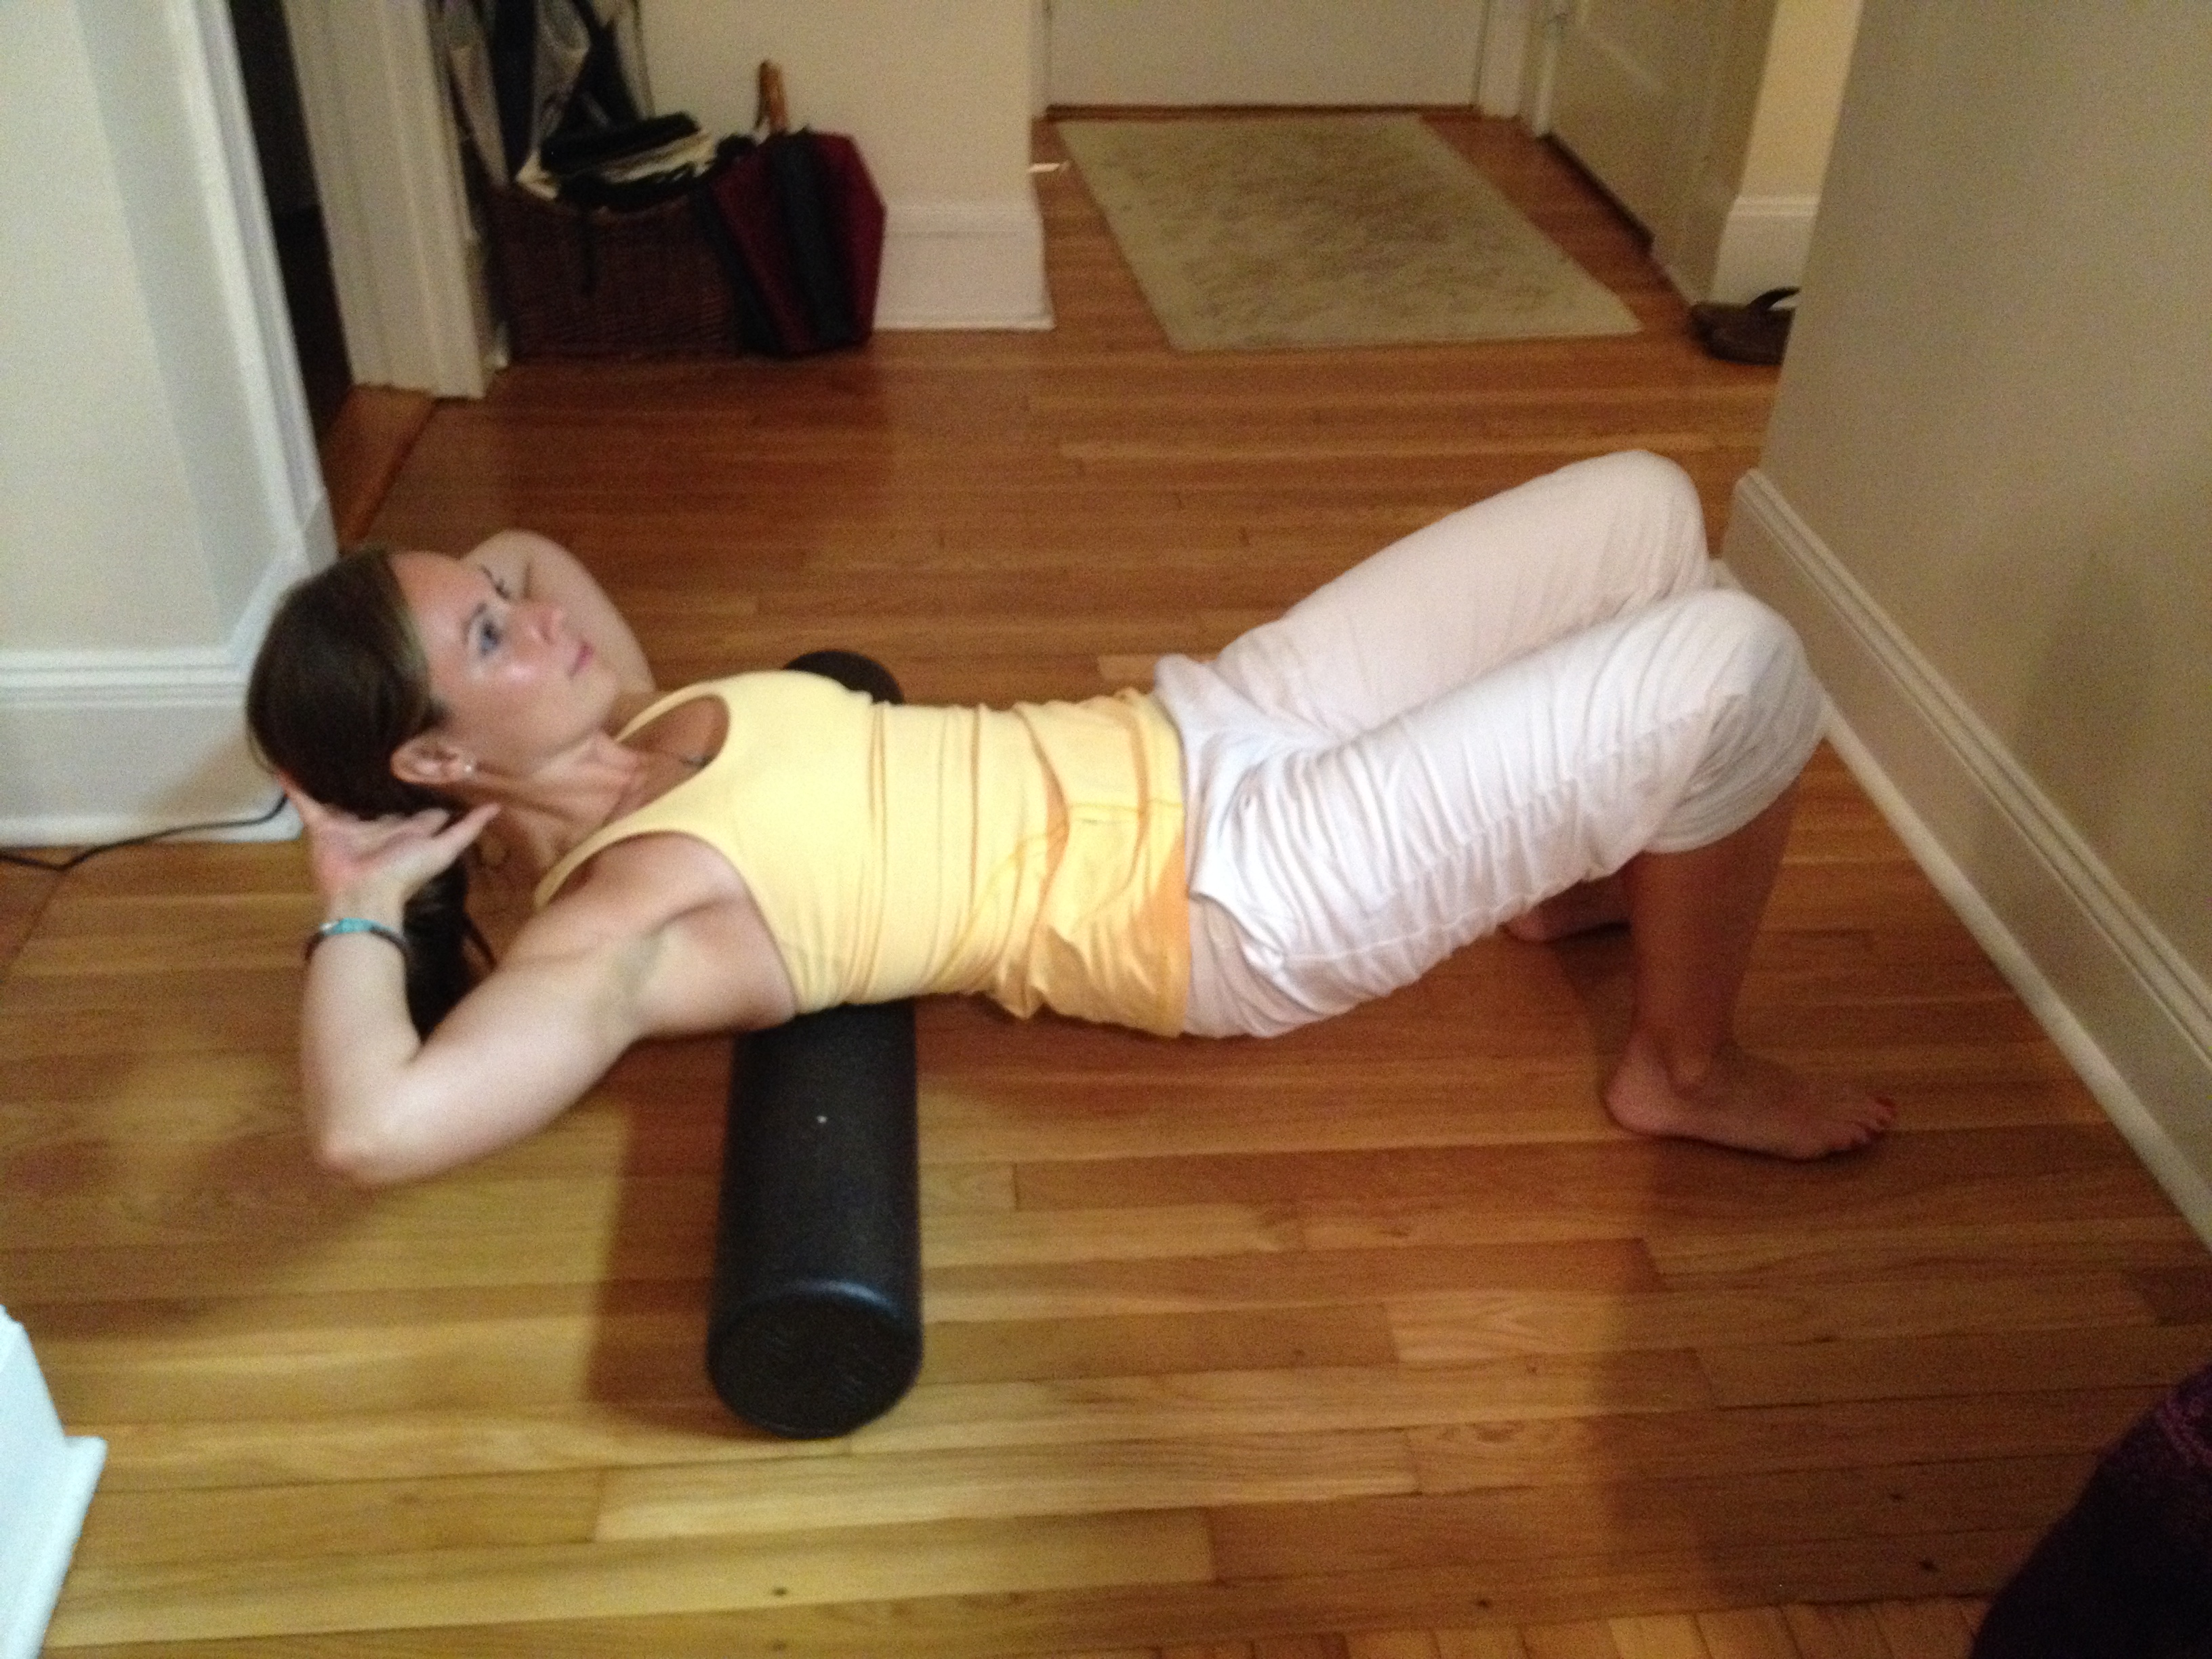
Bridge Lift-offs with foam roller
Get setup for bridge pose but place your heels on the foam roller. On your inhale, lift your hips up pressing down through your heels; using your legs. Then bring your knee into your chest and extend your leg up in the air. Keeping your leg extended, lift and lower your hips to activate your glutes. Repeat 10 to 20 times and switch sides. For modification, keep both heels on the foam roller as you lift and lower.
ROLLING FOR STRETCH
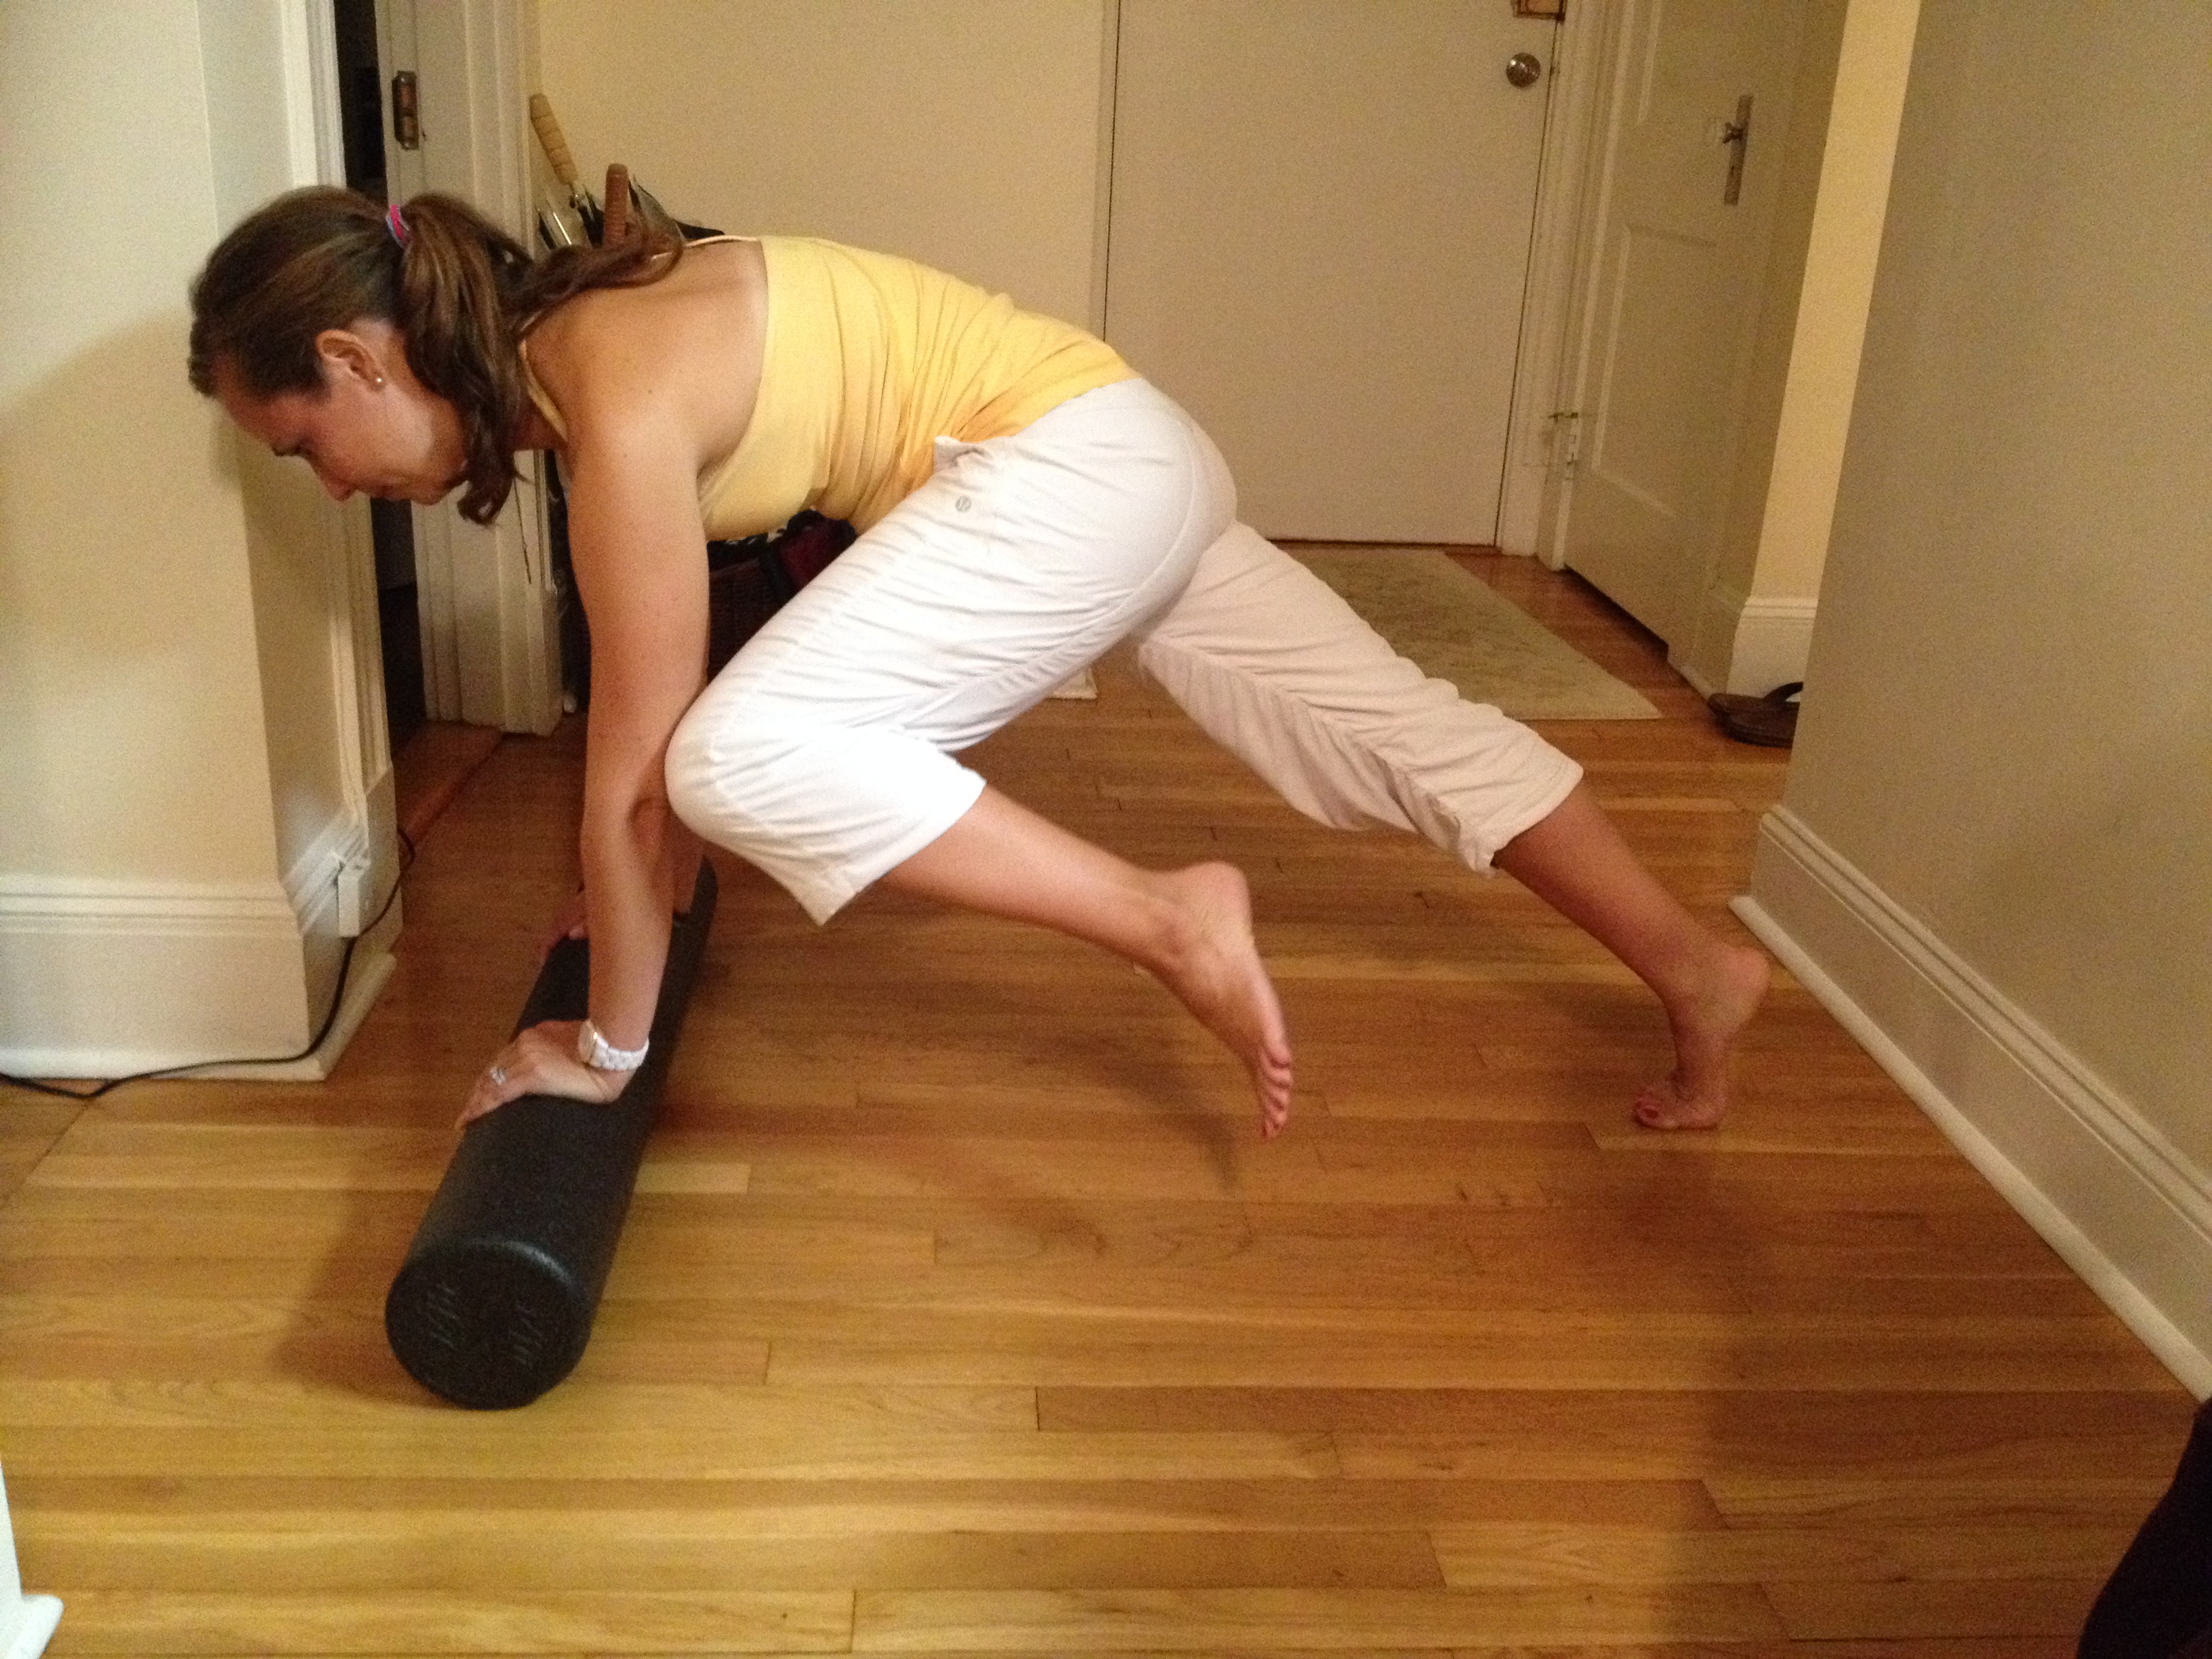
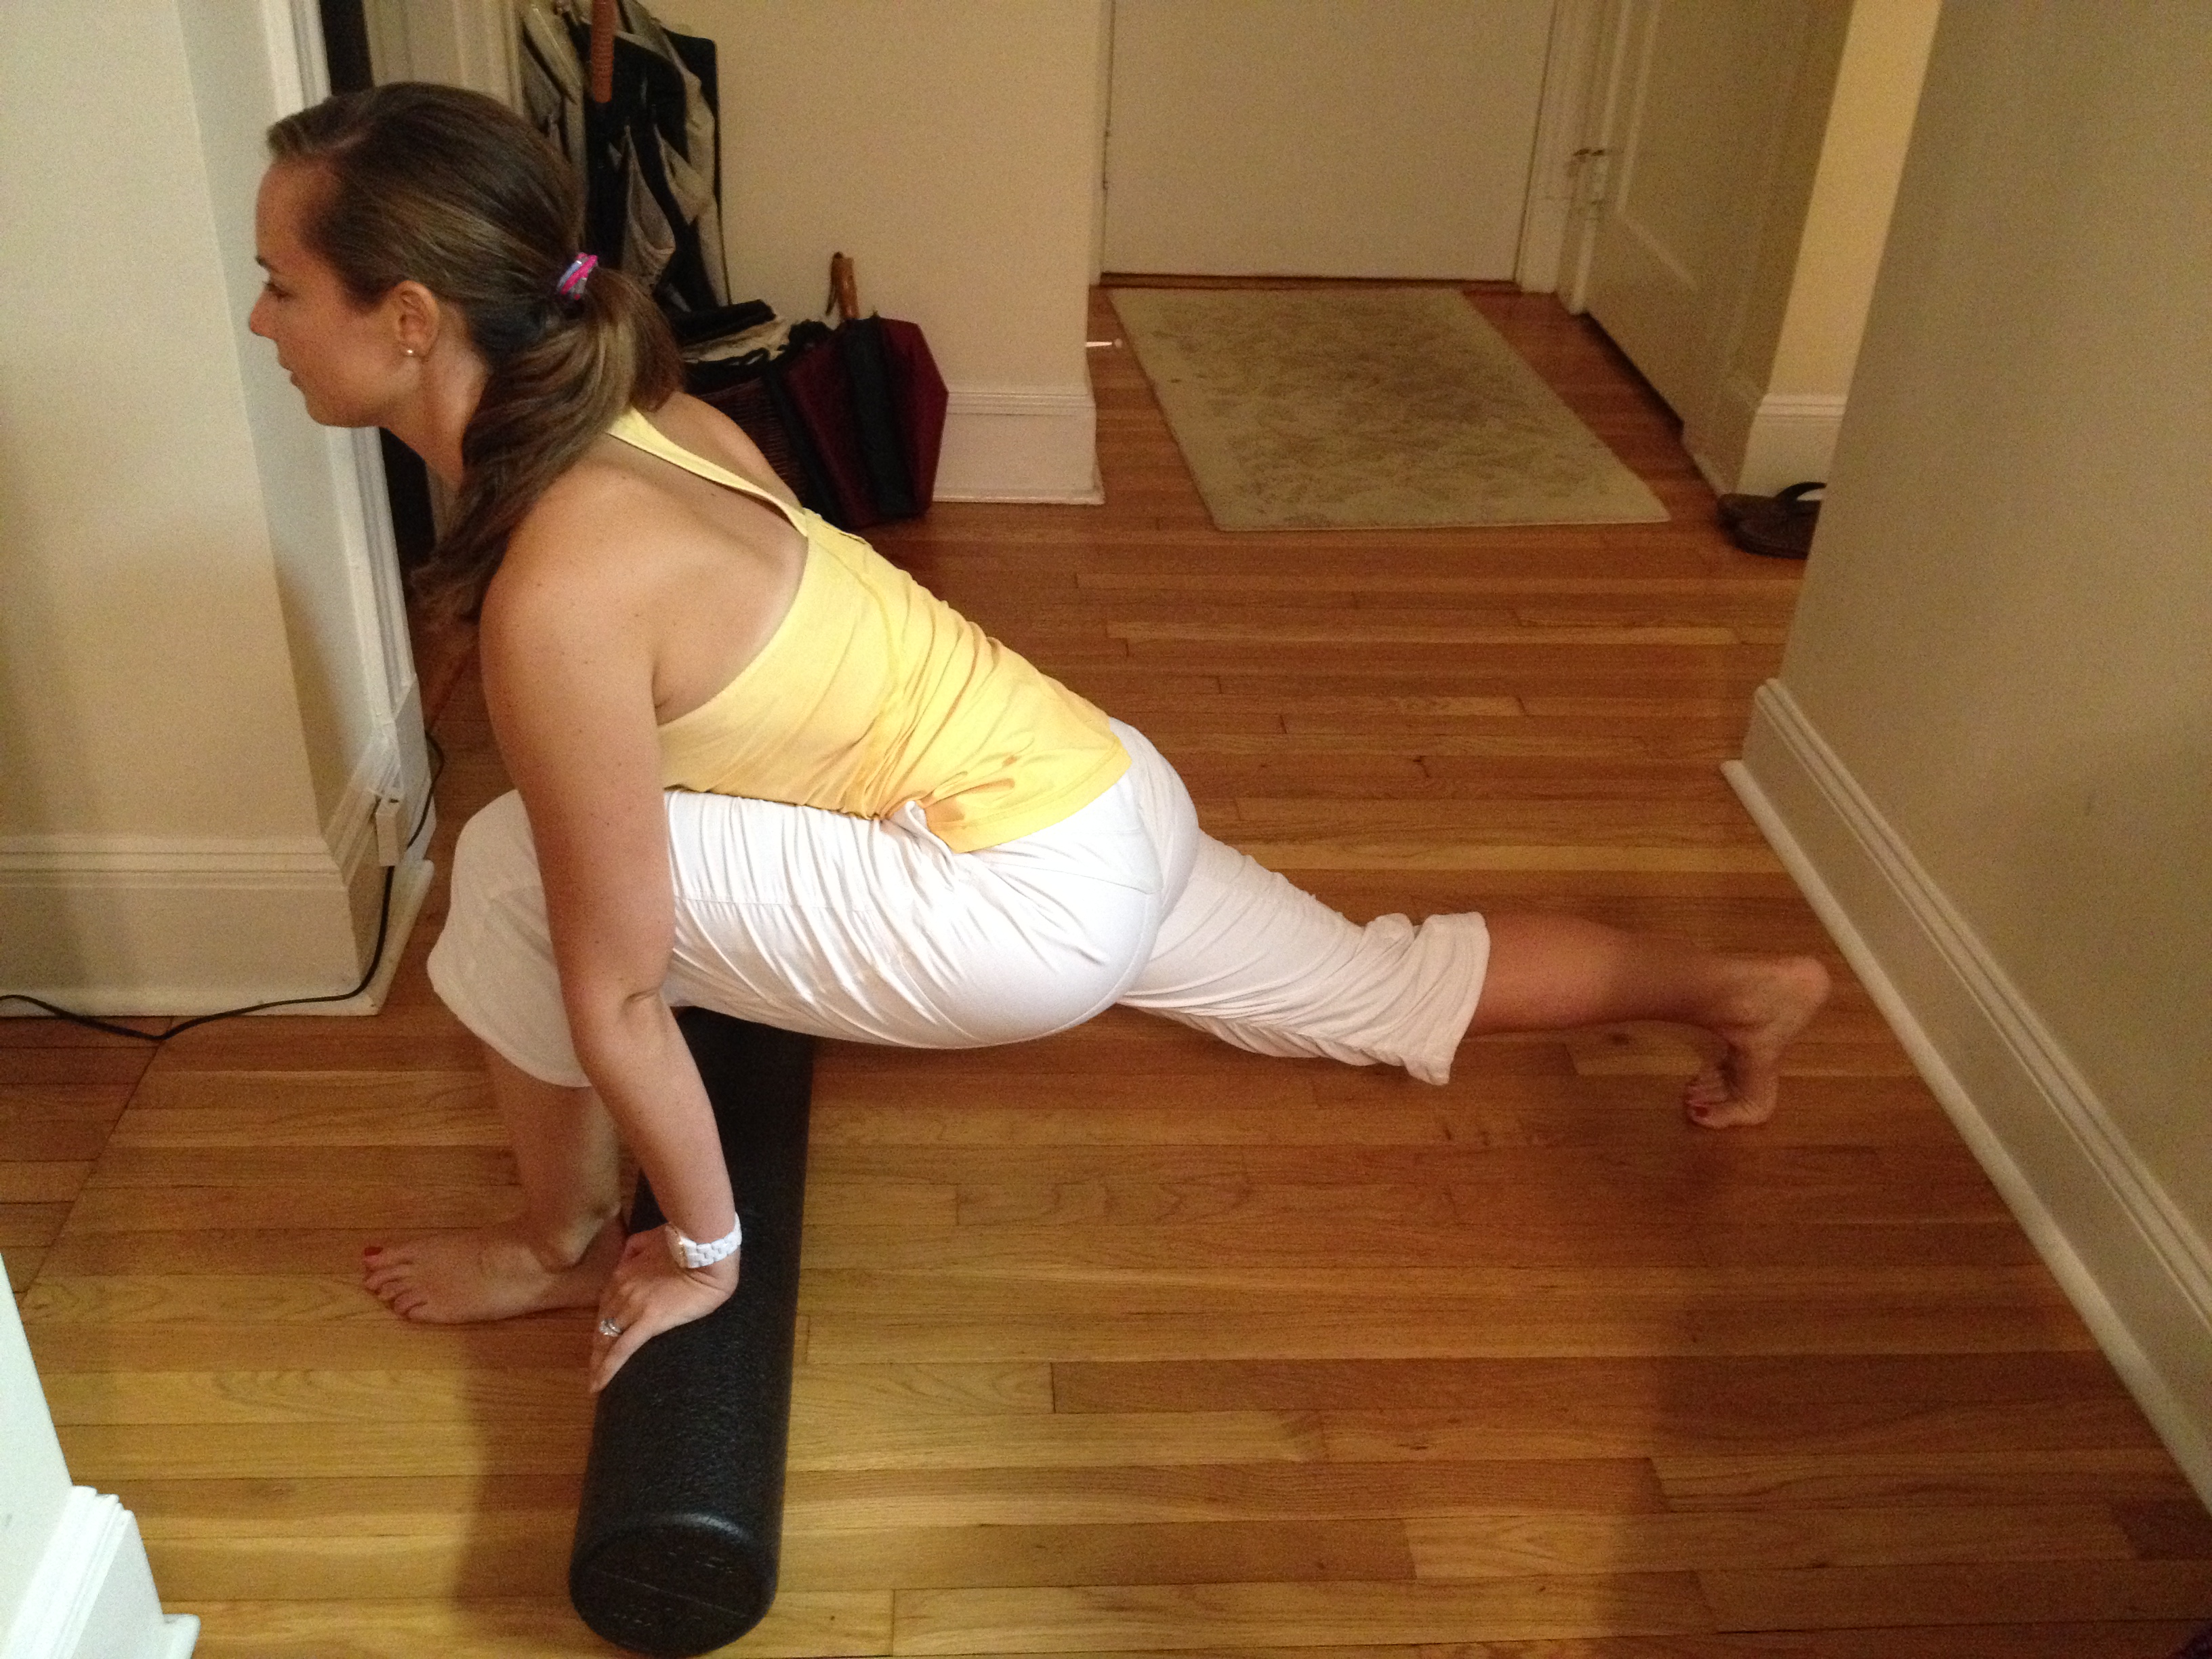
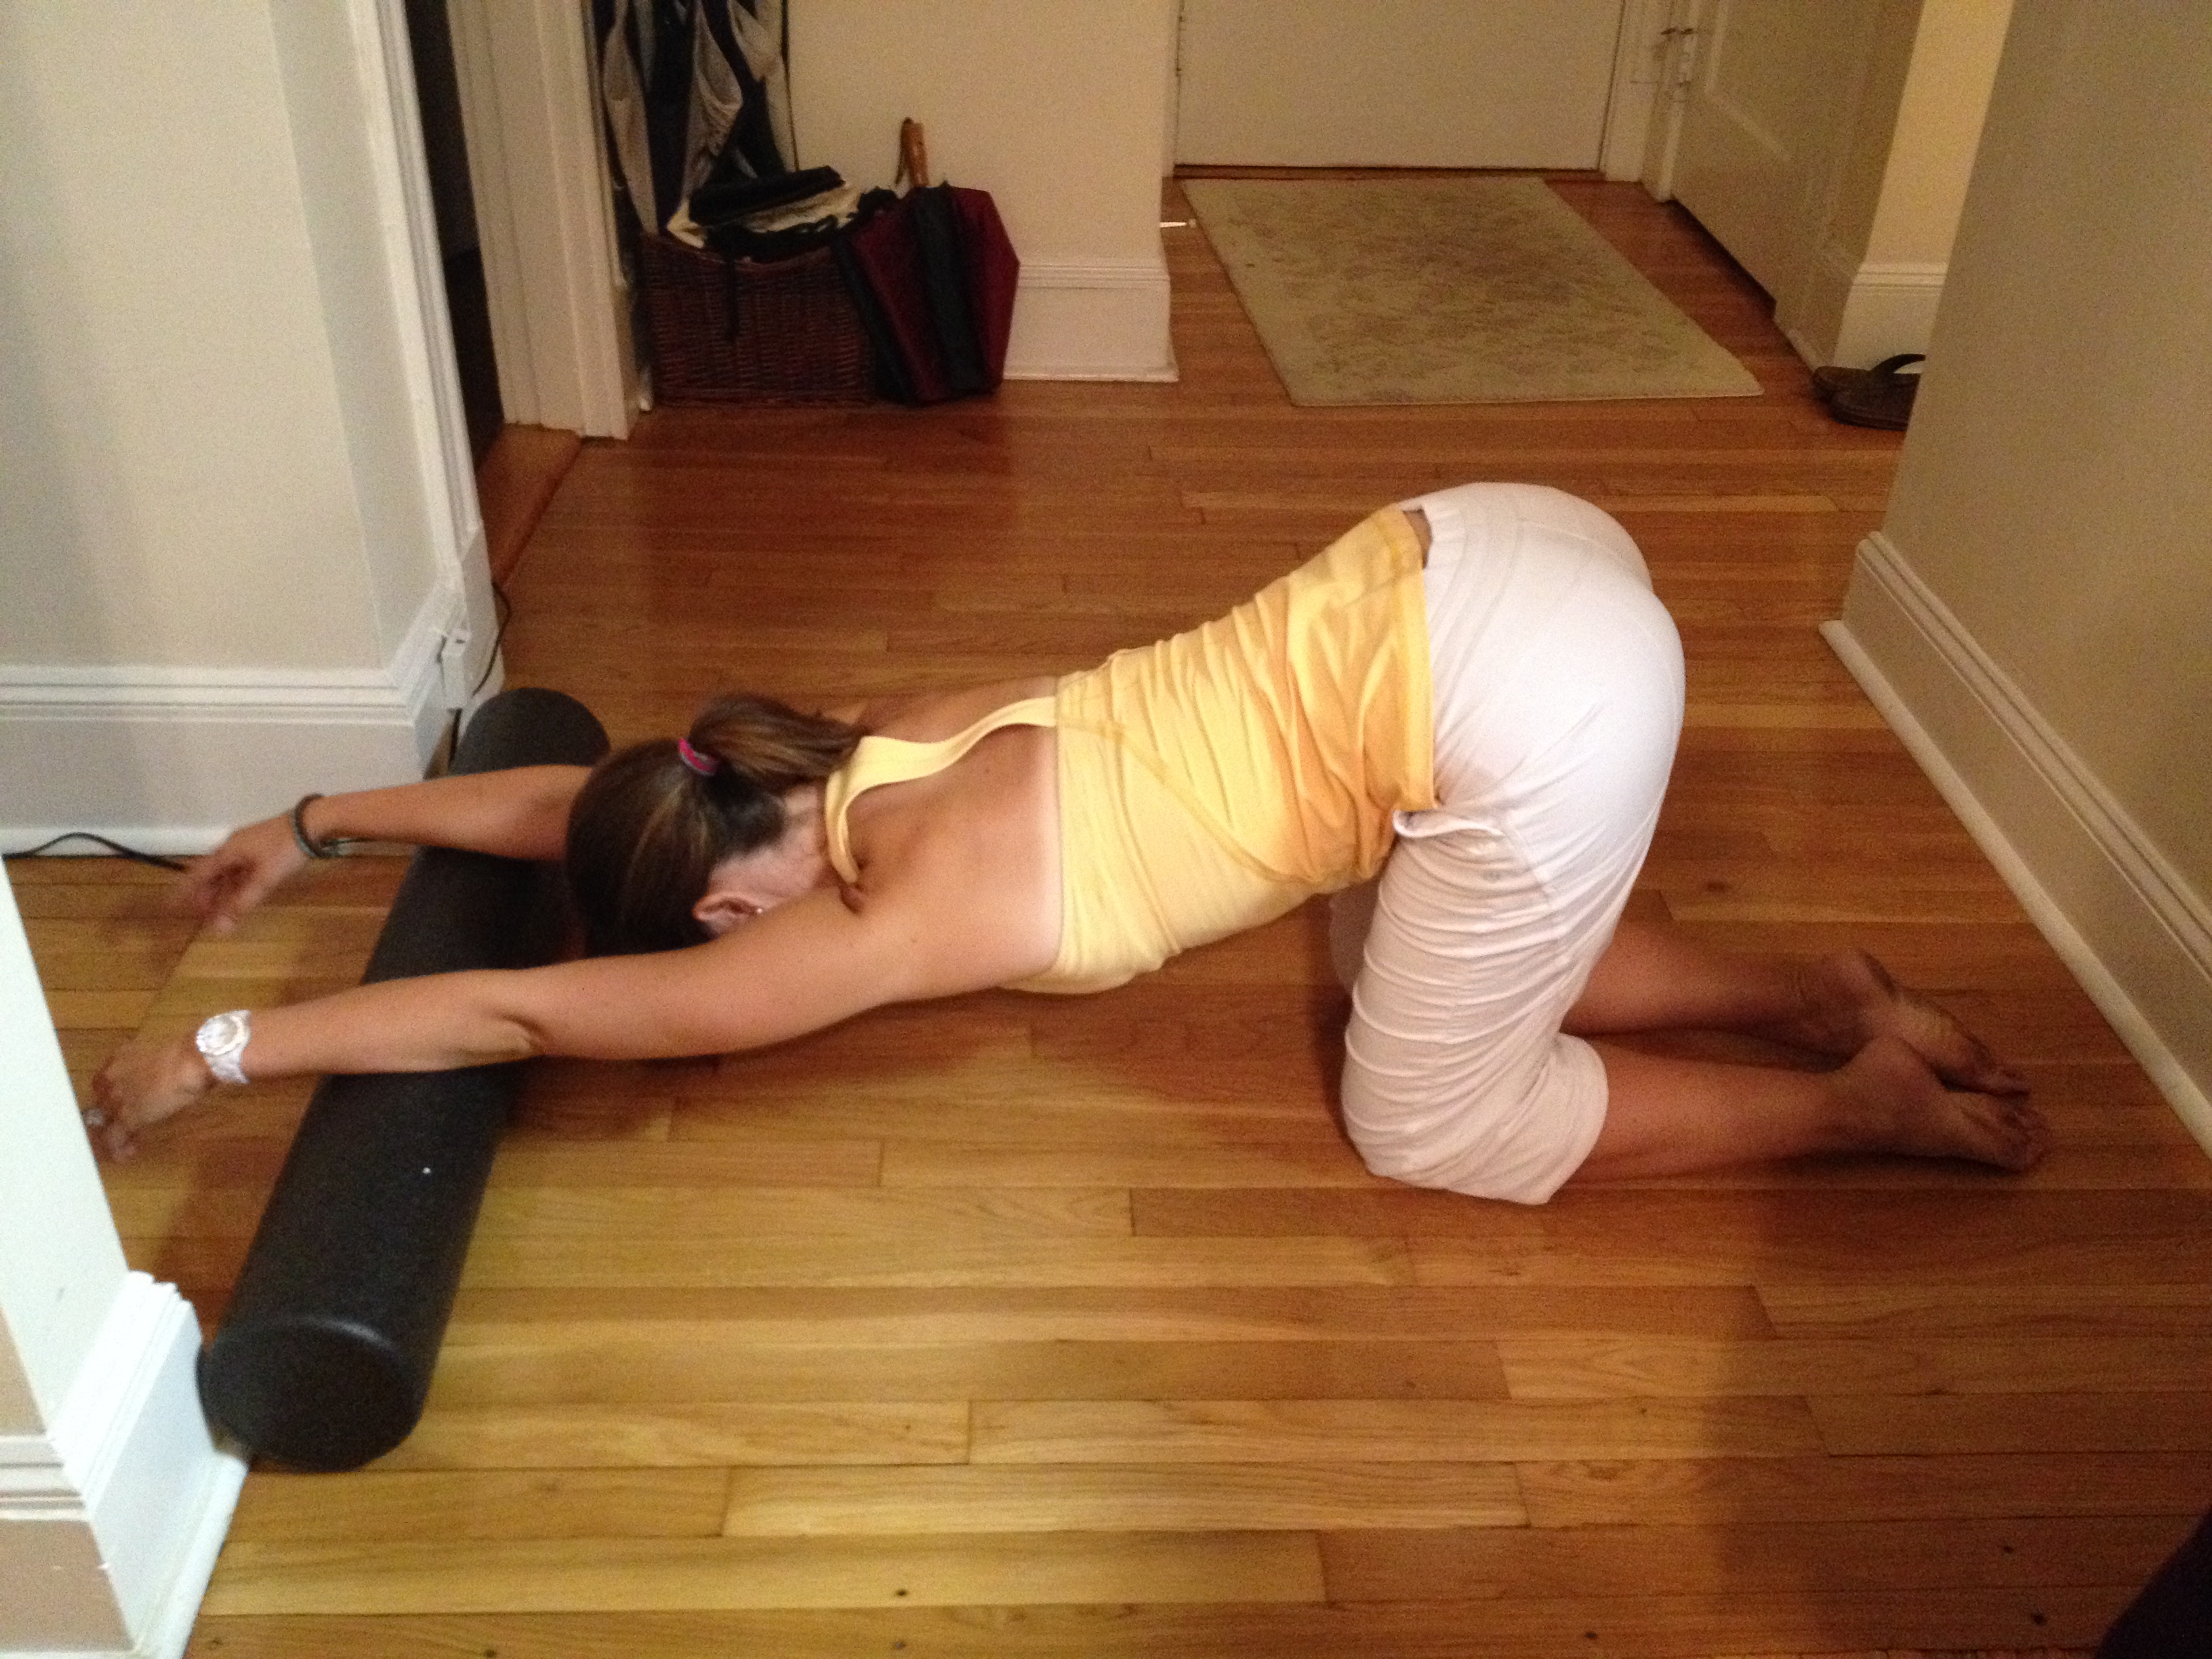
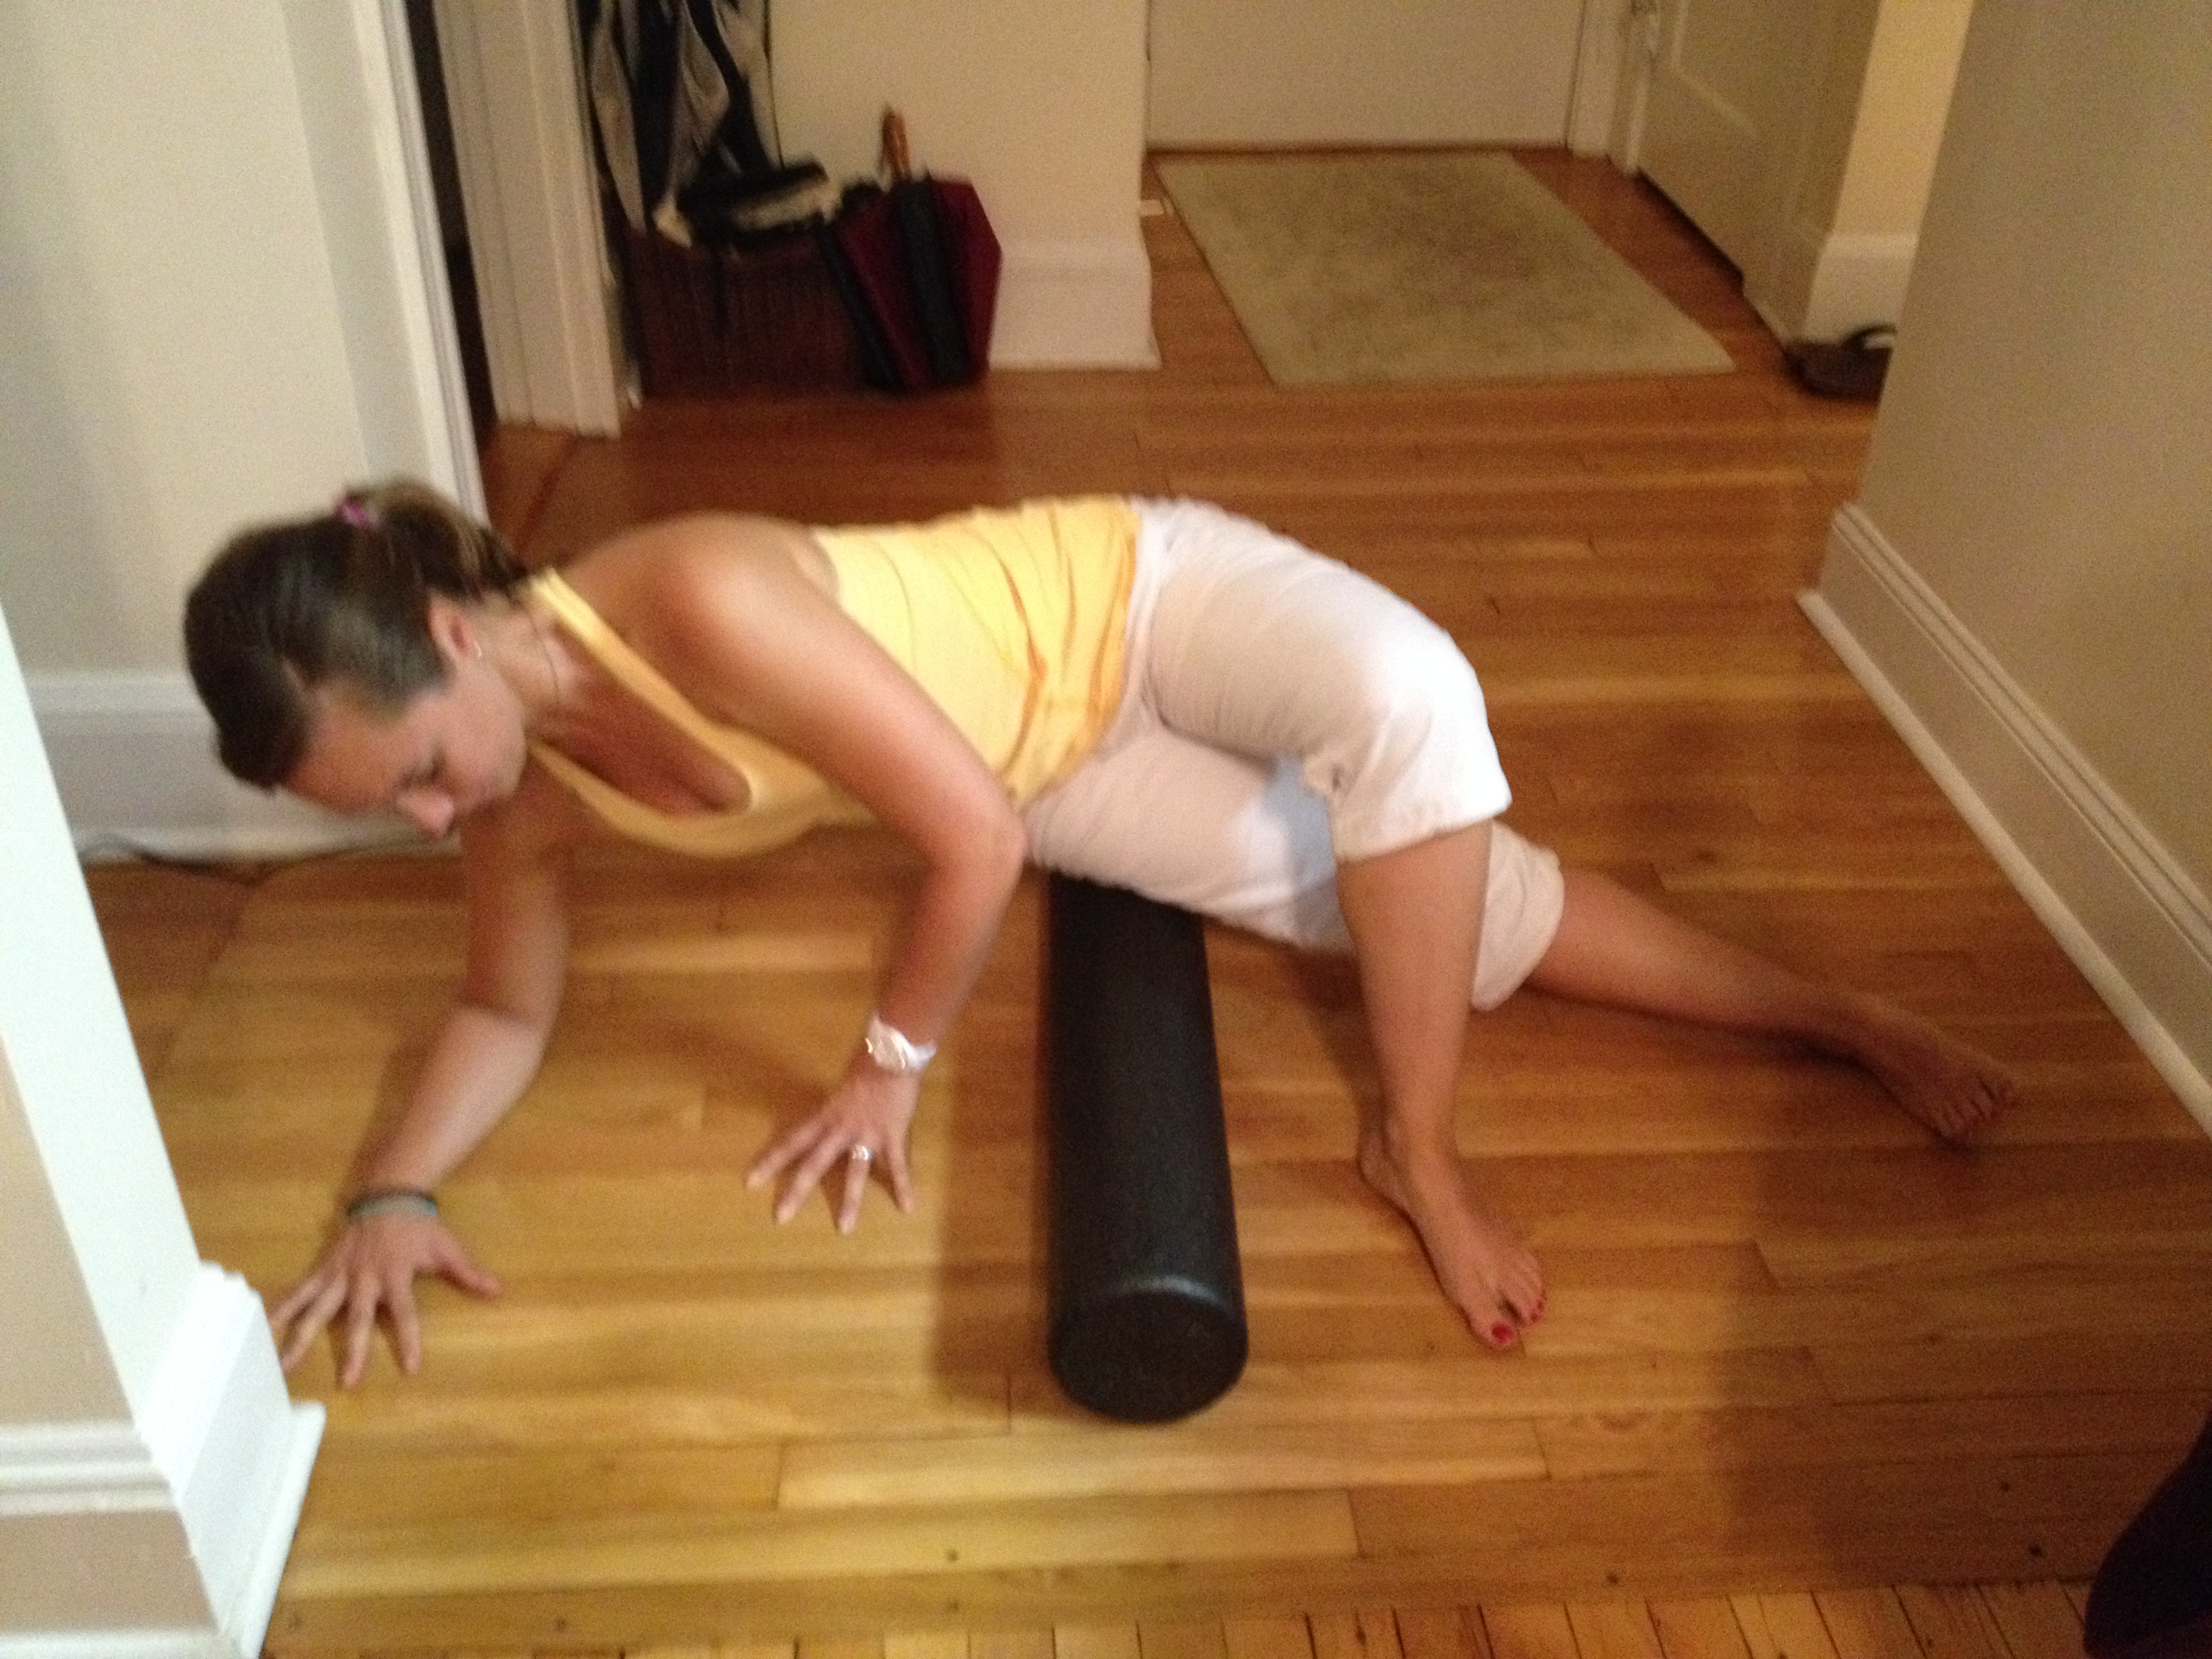
Runners pulses with foam roller
Come into your runners lunge and place the foam roller behind your heel. Place your hands on the foam roller and drop your hips down and lift your gaze to open your chest. Then roll the foam roller back and round your spine as you straighten both of your legs and fold forward. Repeat 3 to 5 times; moving with your breath.
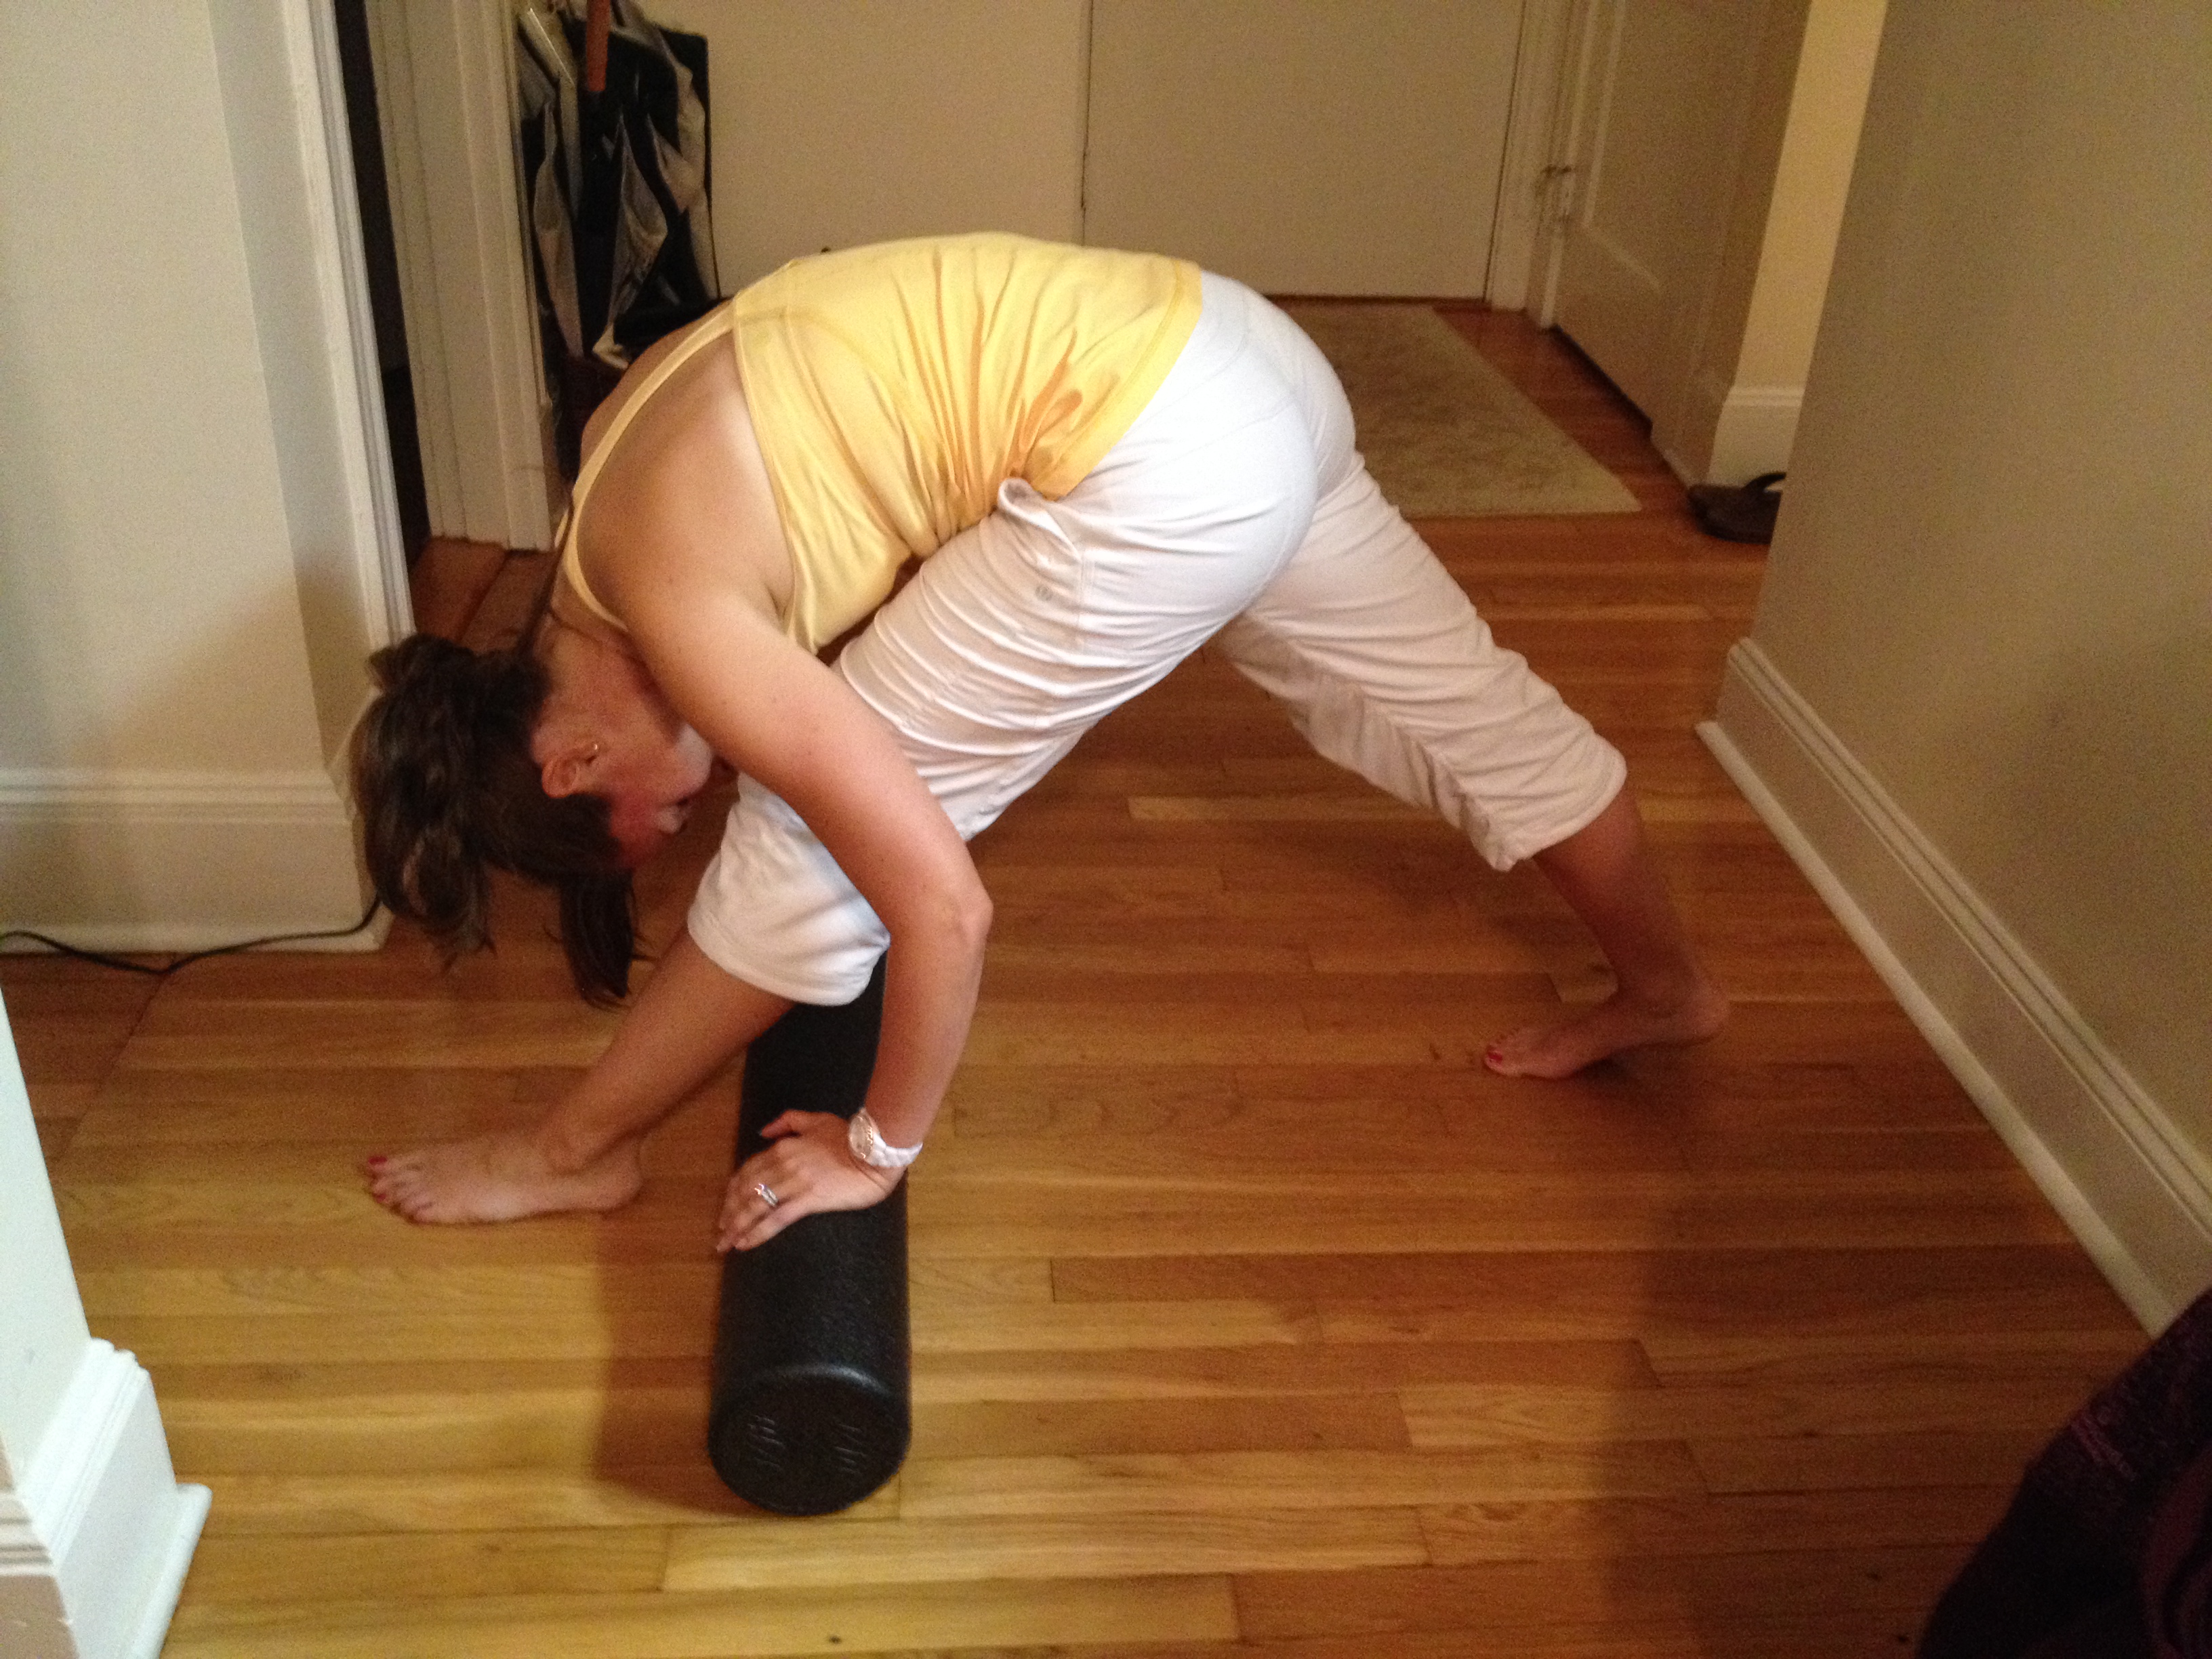
Calve stretch with foam roller
Shorten your stance so your feet are about 3 feet apart. Make sure all ten toes are pointing forward and your back foot is flat. Keep both legs straight and fold forward. Flex your toes up towards the ceiling. Let your hands rest on the foam roller or floor.
Low lunge side bend with foam roller
Come into your low lunge and place the foam roller behind your heel. Then on your exhale, place your hand on the foam roller and extend your arm along side your ear and switch sides. Repeat back and forth 3 to 5 times. Then switch legs. For modification, place your hand to your hip.
Puppy pose with foam roller
Keep your hips over your knees and extend your arms out; letting them rest on the foam roller. Feel free to move back and forth to massage your arms and open the chest.
ROLLING FOR MASSAGE
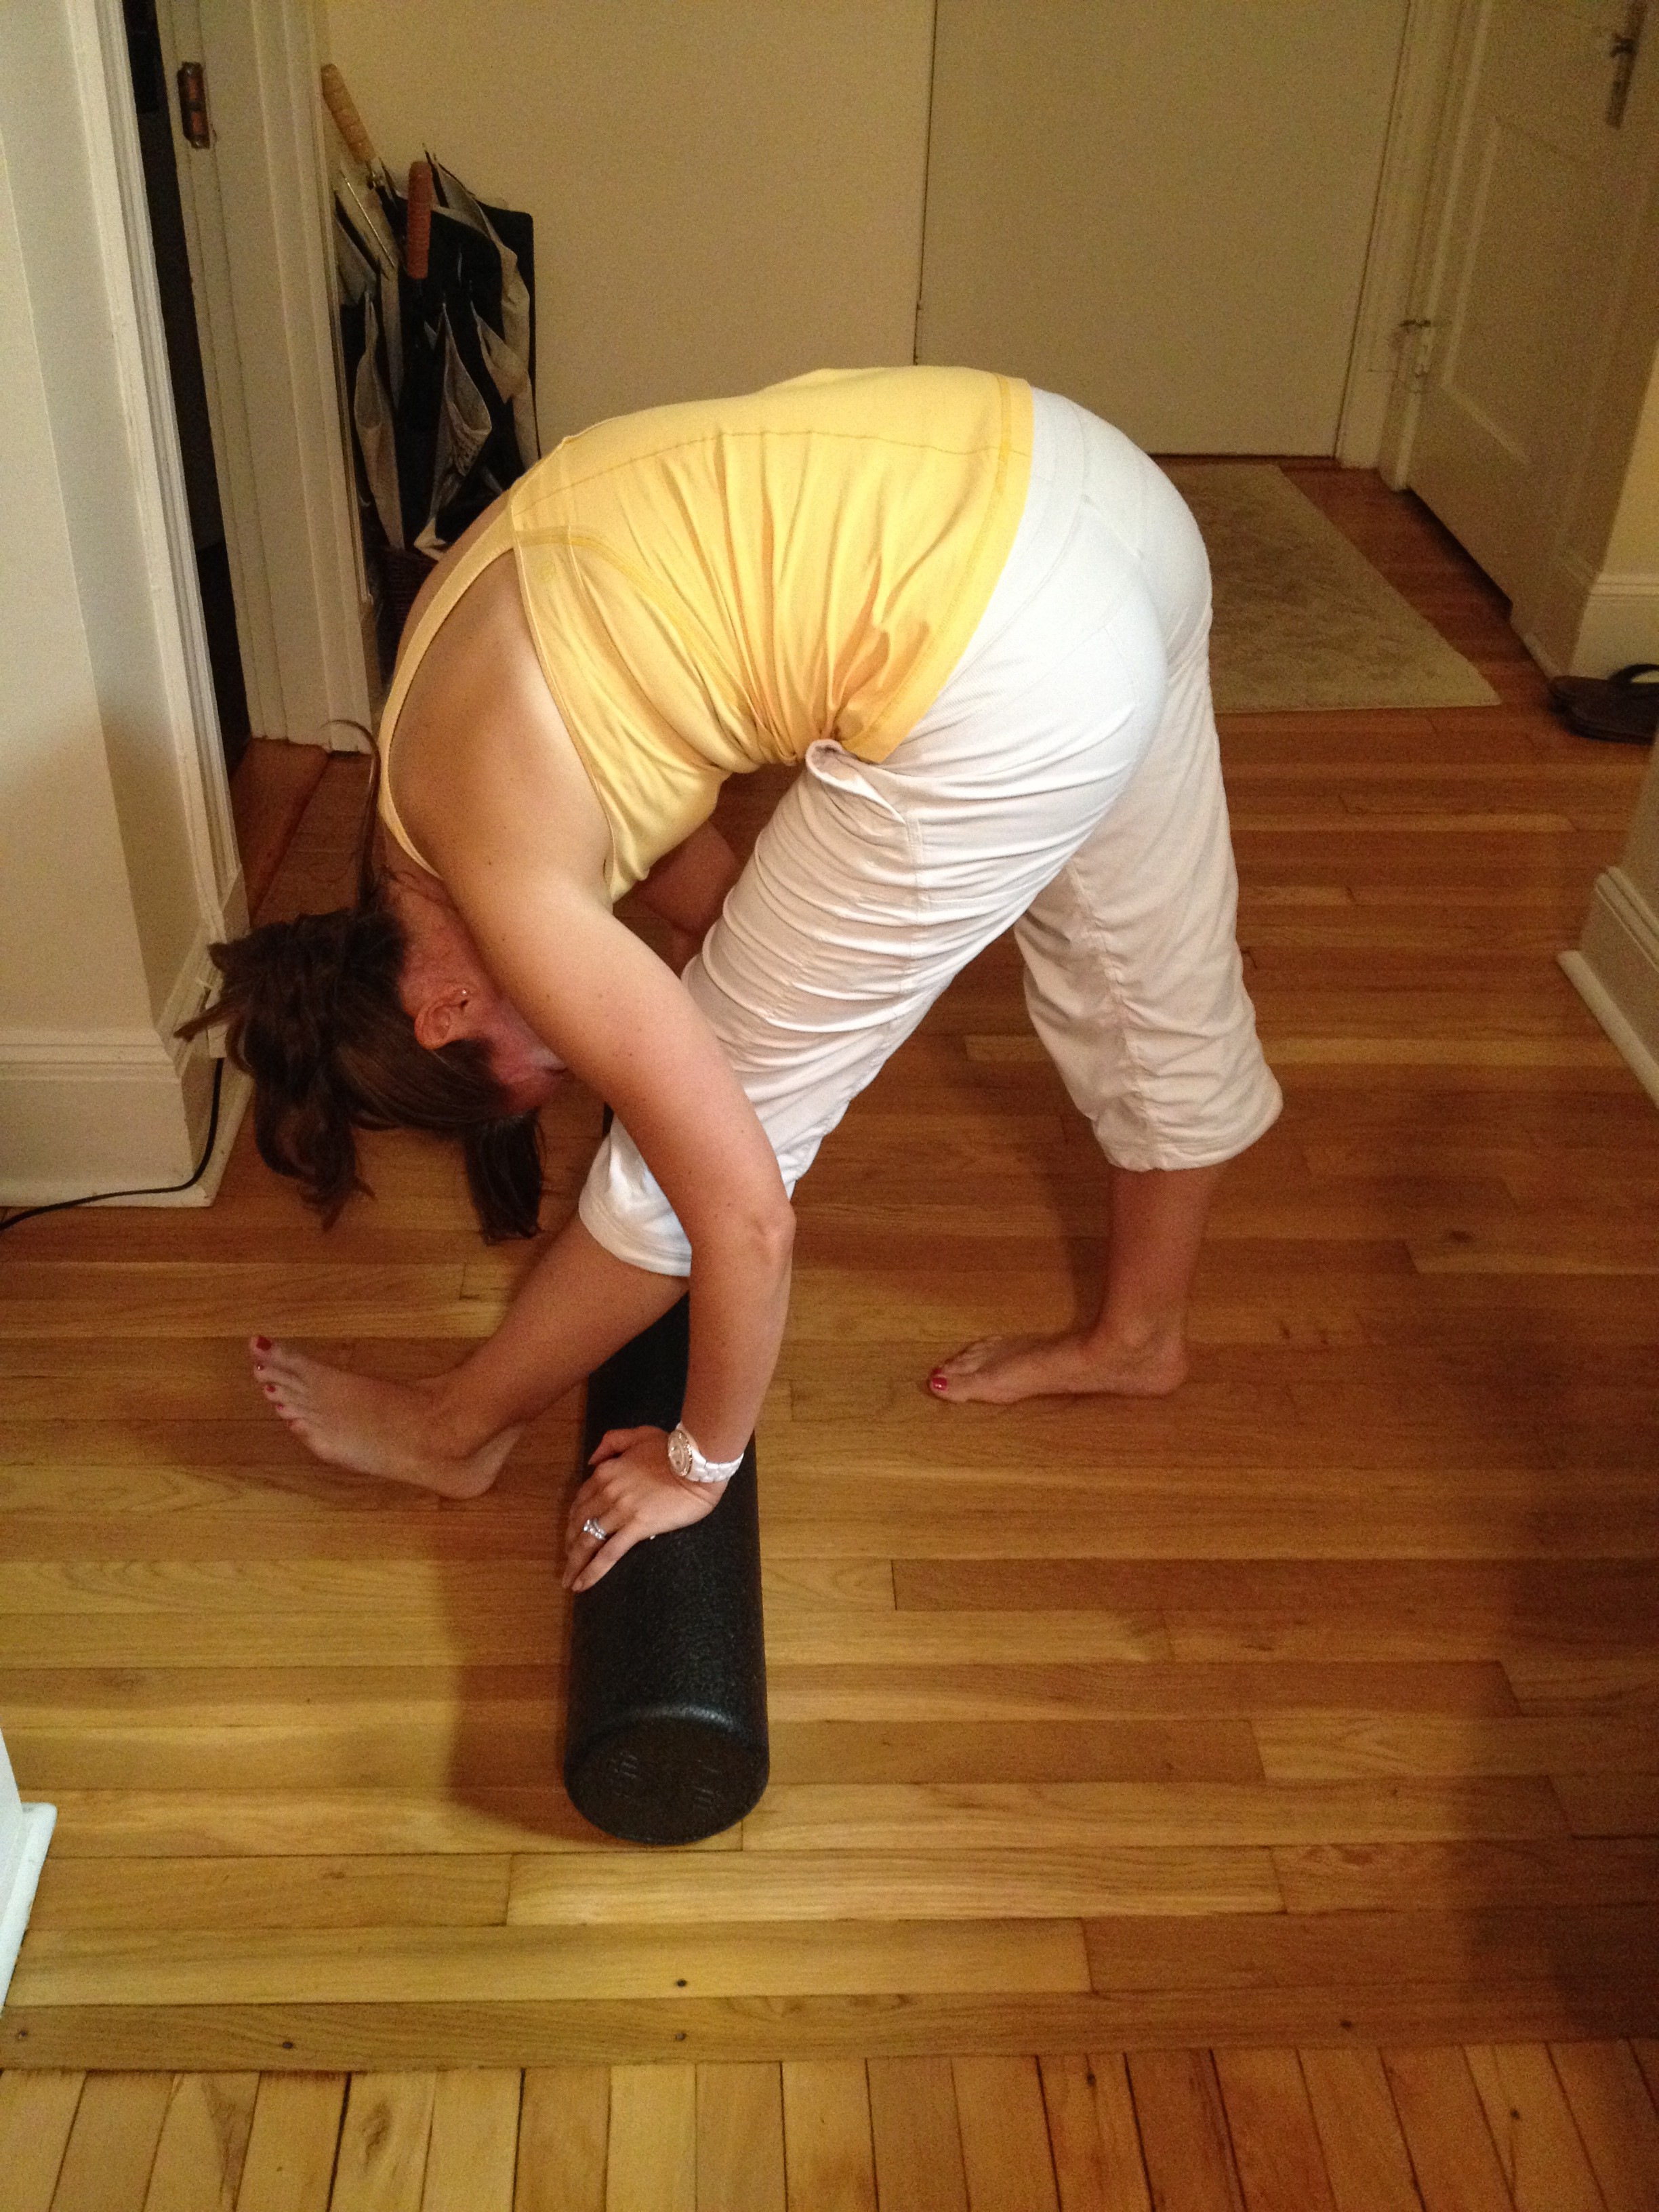
Shin release with foam roller
Come on to your forearms. Place the foam roller right beneath your knees and then bring your knees to your chest until the foam roller comes right above the tops of your feet. Repeat 10 times. Get ready for some CORE work with this one 🙂
Quad release with foam roller
Bring the foam roller to just above your knees. Then roll backwards until the foam roller comes up to the front of your hips. Another great way to engage your core as well.

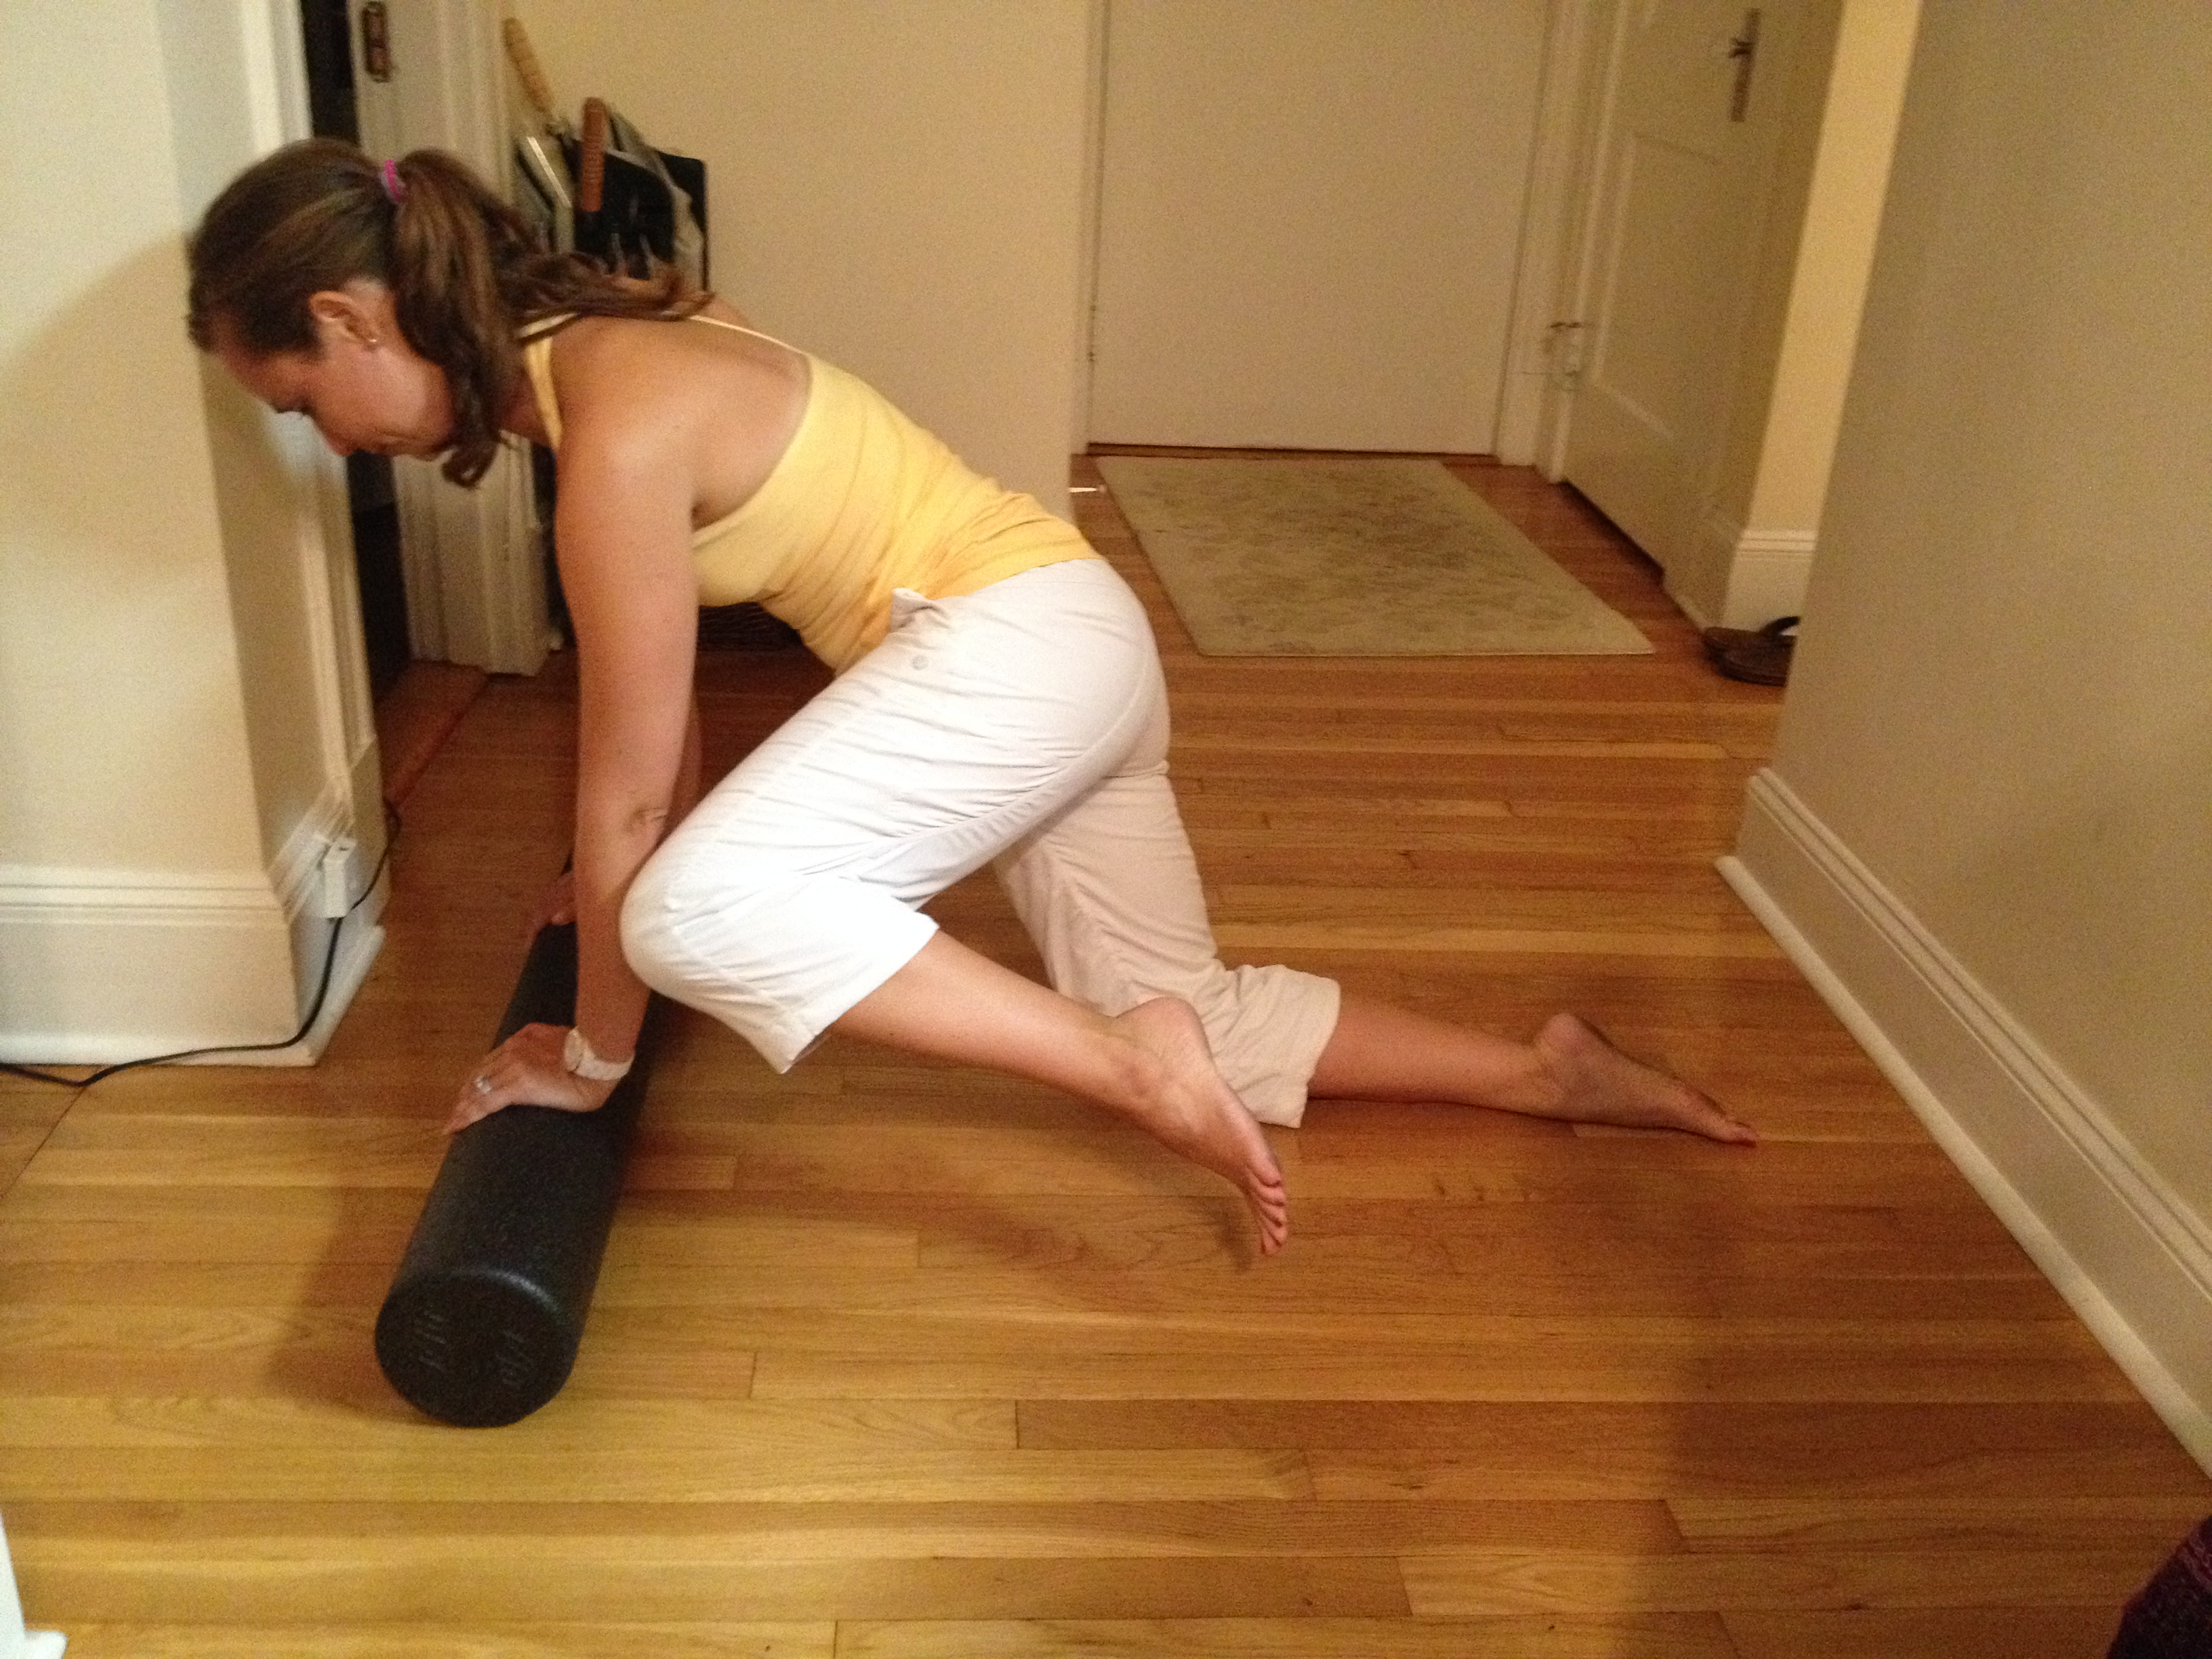
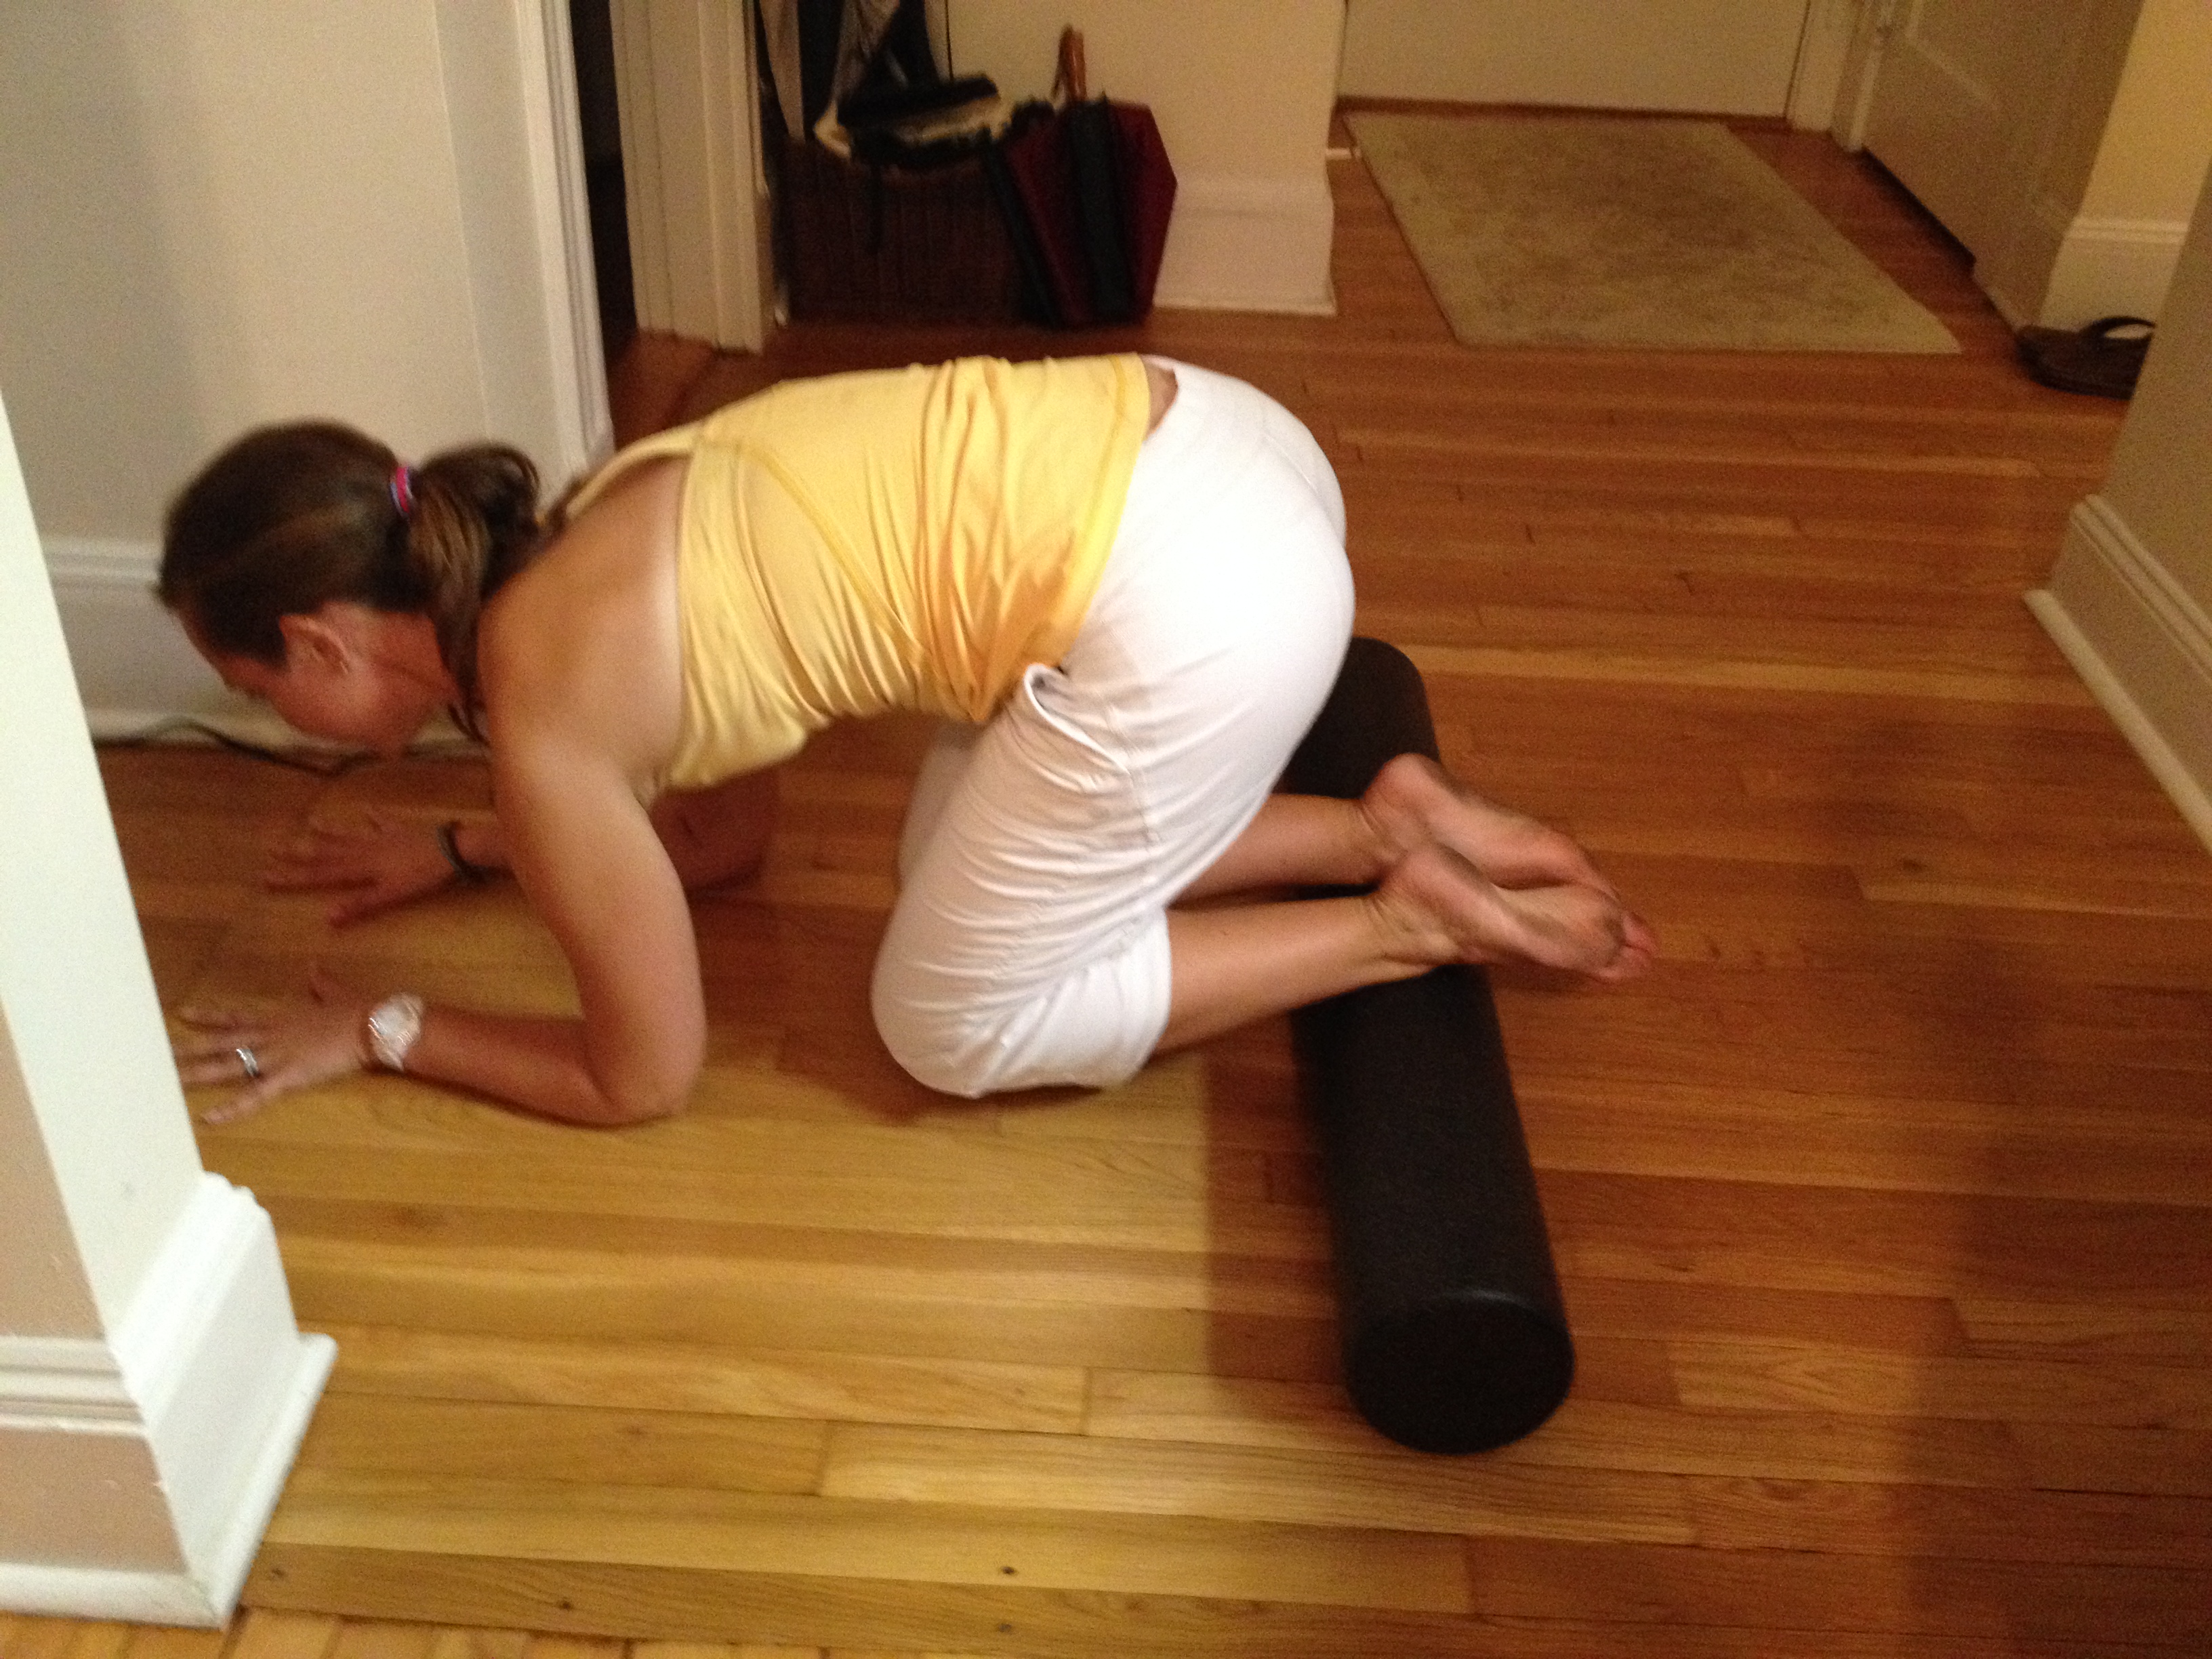
Half pigeon pose with foam roller
Come into your half pigeon pose on the foam roller (knee behind wrist and hips squaring forward). Pulse back and forth by pressing on the back ball of your foot.

IT band release with foam roller
This one is a favorite! Lay on your side and roll the foam roller from your hip to above your knee. Move slowly with this one. Feel free to stack the legs or to place one foot down to make the exercise less intense.

Calve release with foam roller
Roll the foam roller from your heel to your knee. For more pressure, cross the ankles (more core work here!) and to lessen, keep one foot on the floor.
Hamstring release with foam roller
Bring the foam roller up higher to your hamstring region and move it back and forth from under your butt to your knee. Cross legs for more pressure and to lessen, place one foot down.
Glute release with foam roller
Sit on the foam roller and come into your figure 4. Place your weight onto the side of your hip in which the knee is bent. Move back and forth making slight movements and then switch sides.

Upper back release with foam roller
Place the foam roller right by the wing tips of your shoulders. Place your hands under your neck for support and then move the foam roller to the top the shoulders and back down.
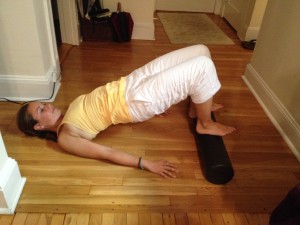
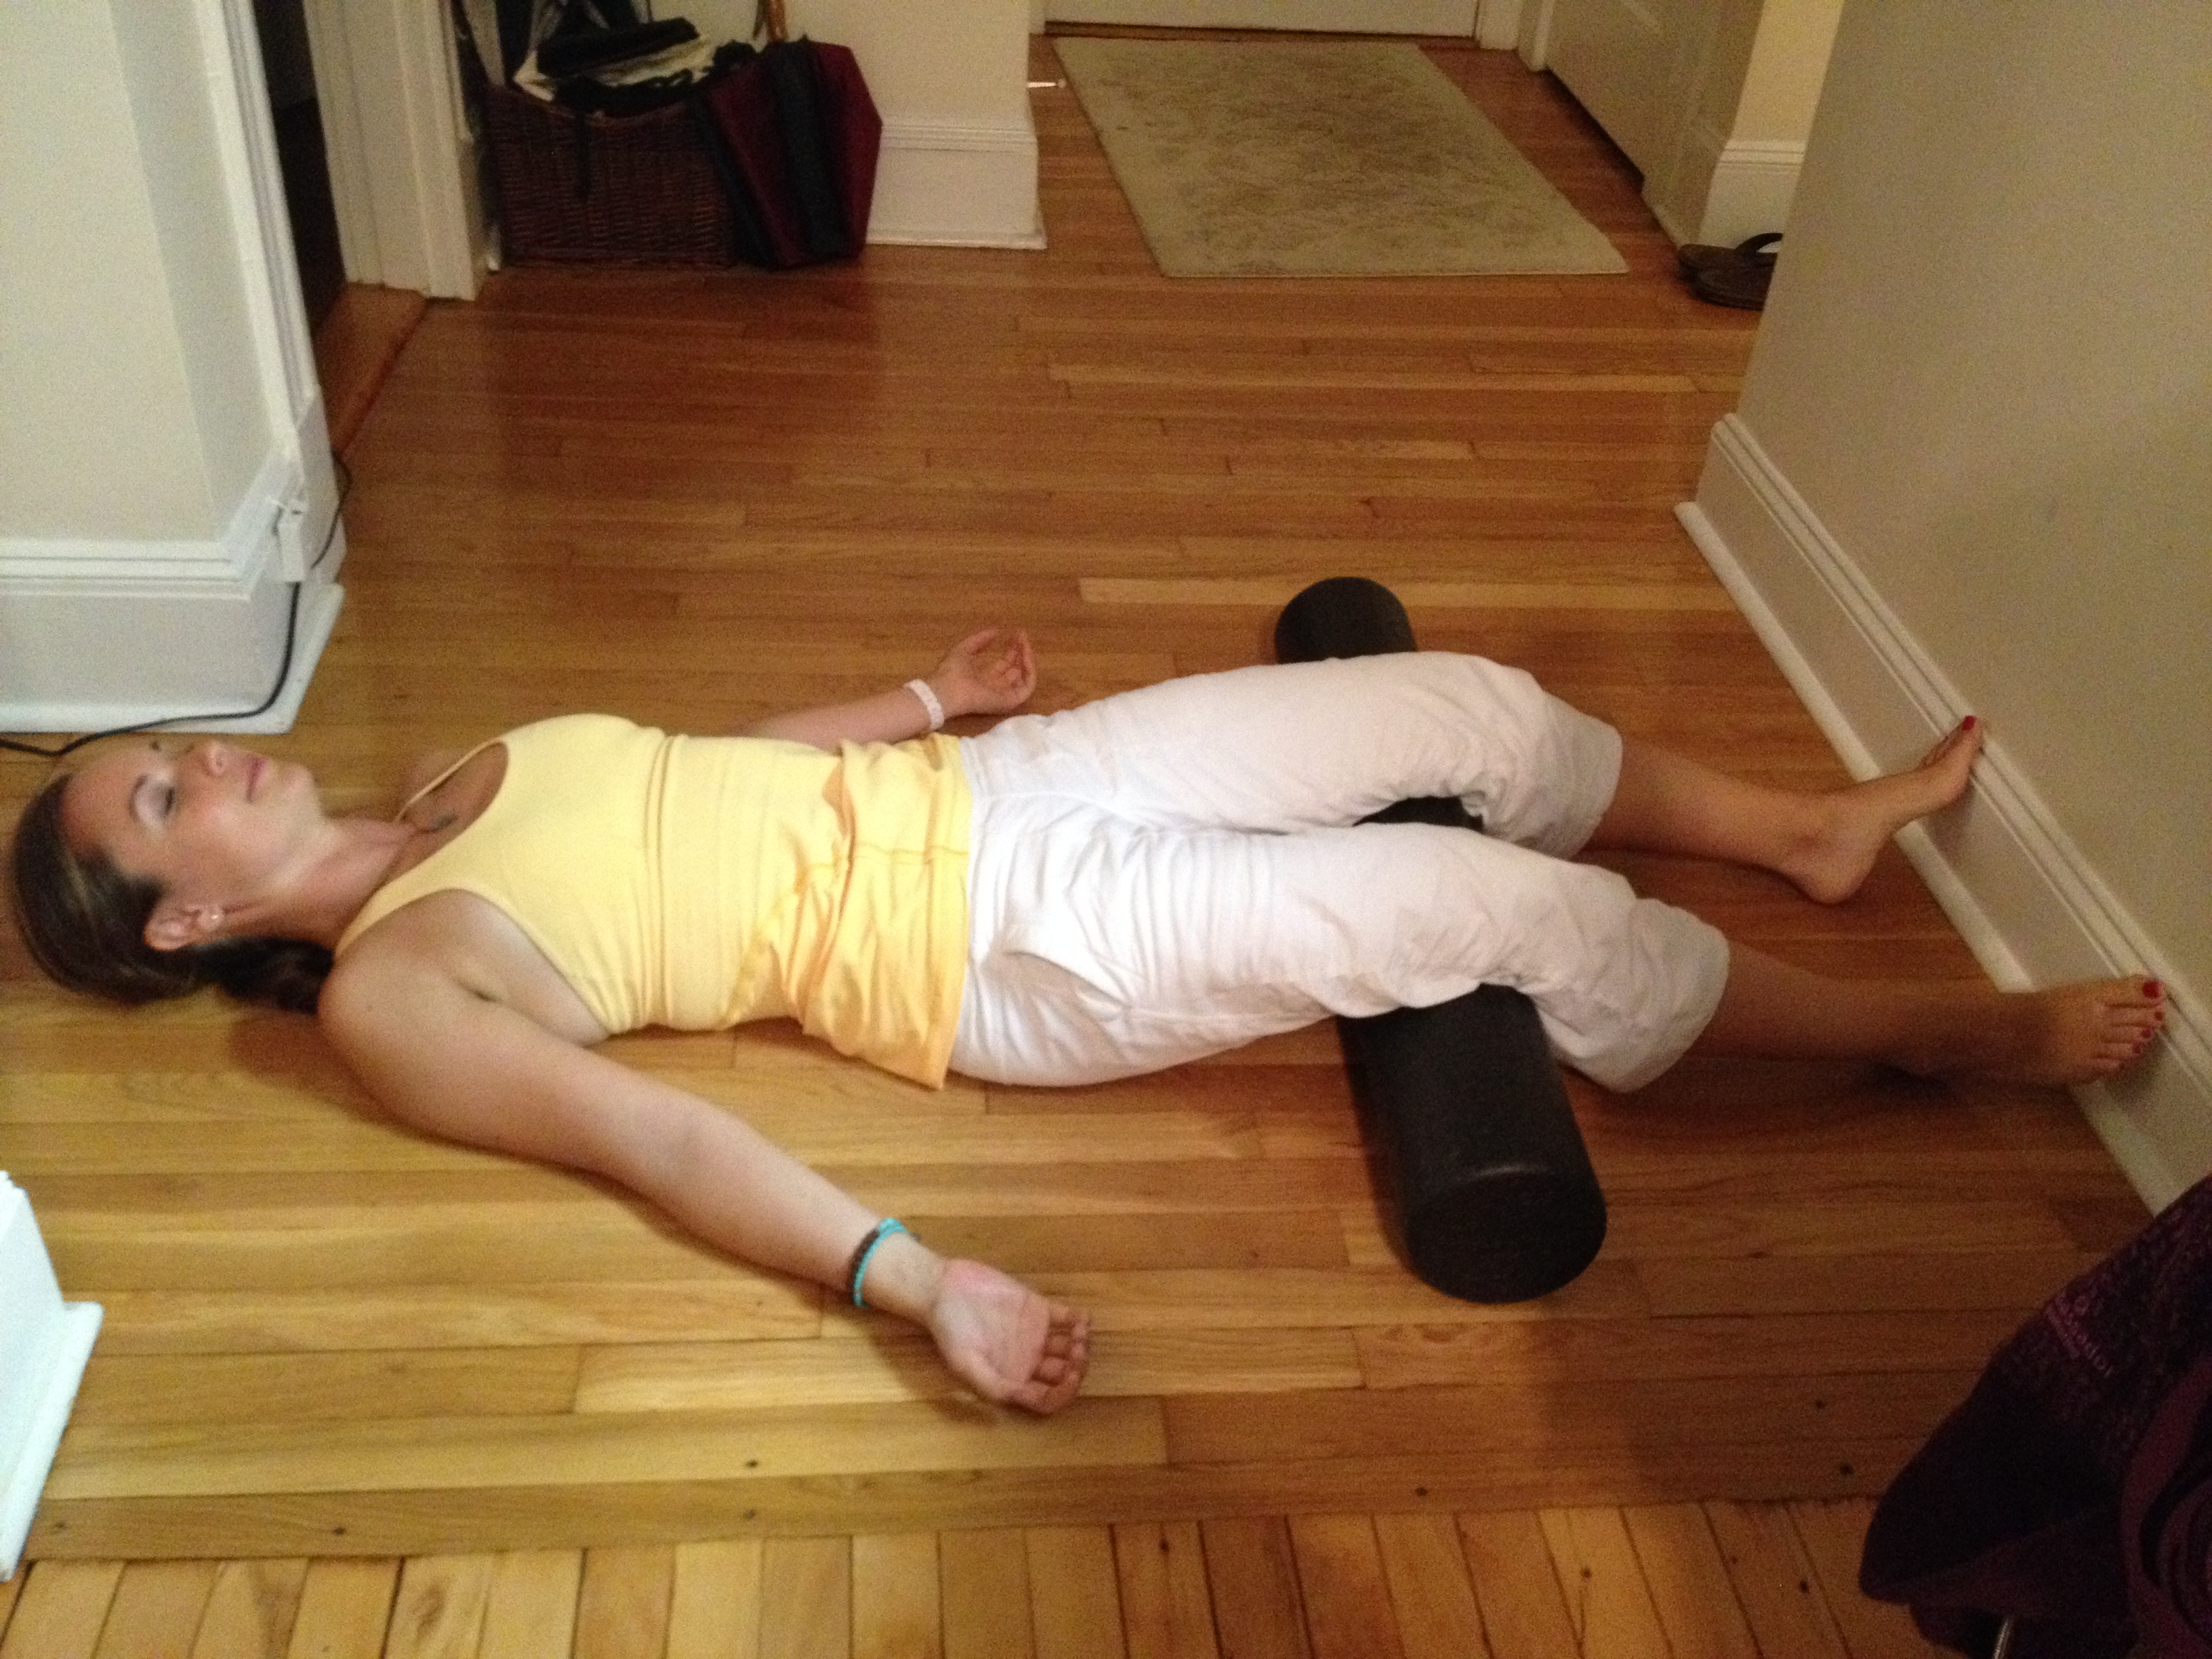
Savasana with foam roller
Place the foam roller under your knees and extend your legs and arms out. Enjoy all the hard work you just did. Hold for at least 1 minute 🙂 NAMASTE!
Meditation and concentration are the way to a life of serenity
You can enter yoga, or the path of yoga, only when you are totally frustrated…
The Perfect Friday Get Away
Let’s be honest, this weather is killing us. The cold and the snow seem to…
Meditation: Get Into the Zone
Meditation is the hardest self care tool for me. Just like any difficult run, work-out…